
[ad_1]
If you are a content creator or post photos and videos on Instagram, you will be happy to know that the mobile app has a new feature — the ability to organize posts and reels. This is an important feature that has been missing from Instagram all this time. It’s here now, so let’s tell you how you can use the feature to organize your Instagram posts and gels easily.
Previously, you had to resort to third-party applications and services to set up ads on Instagram which is not good because those apps may not be reliable. There’s a built-in tool to solve this issue so we’re glad it’s here. If you are asking for this feature all this time, how can you organize Instagram posts and reels through the mobile app on iPhone and Android. Let’s start with the basics.
What types of ads you can set up on the Instagram application
The new scheduling feature on Instagram lets you schedule photos, carousel posts, and reels. You can’t customize stories right now but there’s a chance that Instagram could expand the ability to customize stories in the coming months.

The feature is very helpful for creating Instagram posts for free which has been a difficult task for creators until now.
How to schedule Instagram posts and Videos on iPhone and Android
Currently, the ability to organize posts and reels is available through the Instagram app on Android and iOS. Follow along to learn how you can use the feature on both platforms.
The new customization feature on Instagram is only available on business and developer accounts. So if you have a standard account you want to convert it into a business one. Follow the instructions below to learn how to do it. If you have a business account, skip this section.
Turn your Instagram account into a business account
Step 1: Open the Instagram app on your iPhone or Android device. Navigate to your account by clicking the icon in the bottom-right corner of the app.

Step 2: Tap the three lines in the top-right corner to access more options.

Step 3: Select Settings. Then, navigate to the Accounts section.


Step 4: Scroll all the way down. Select ‘Switch to professional account’.

Step 5: Scroll through all the pages and hit Continue.

Step 6: Choose a category that describes your profile. Select Done.

Step 7: Select whether you want a Creator or Business account. The listing feature is available on both account types.

Step 8: You can continue to set up your profile and other details, or tap the ‘X’ button in the top-right corner to exit the process.

Now you have successfully turned your account into a professional account on Instagram.
Tip: You can delete your Instagram business account whenever you want.
Customize IG Posts and Videos Without Third-Party Services
Now that you have a professional account, you can go ahead and schedule posts through the app on iOS and Android. Here’s how.
Step 1: Open the Instagram app on your iPhone or Android device. Select the New Post option.

Step 2: Choose the photo or video you want to customize from the media library.

Step 3: Click Next in the top-right corner. Click Next again.


Step 4: Include all relevant information such as labels and placeholders. Then, select Advanced Settings.

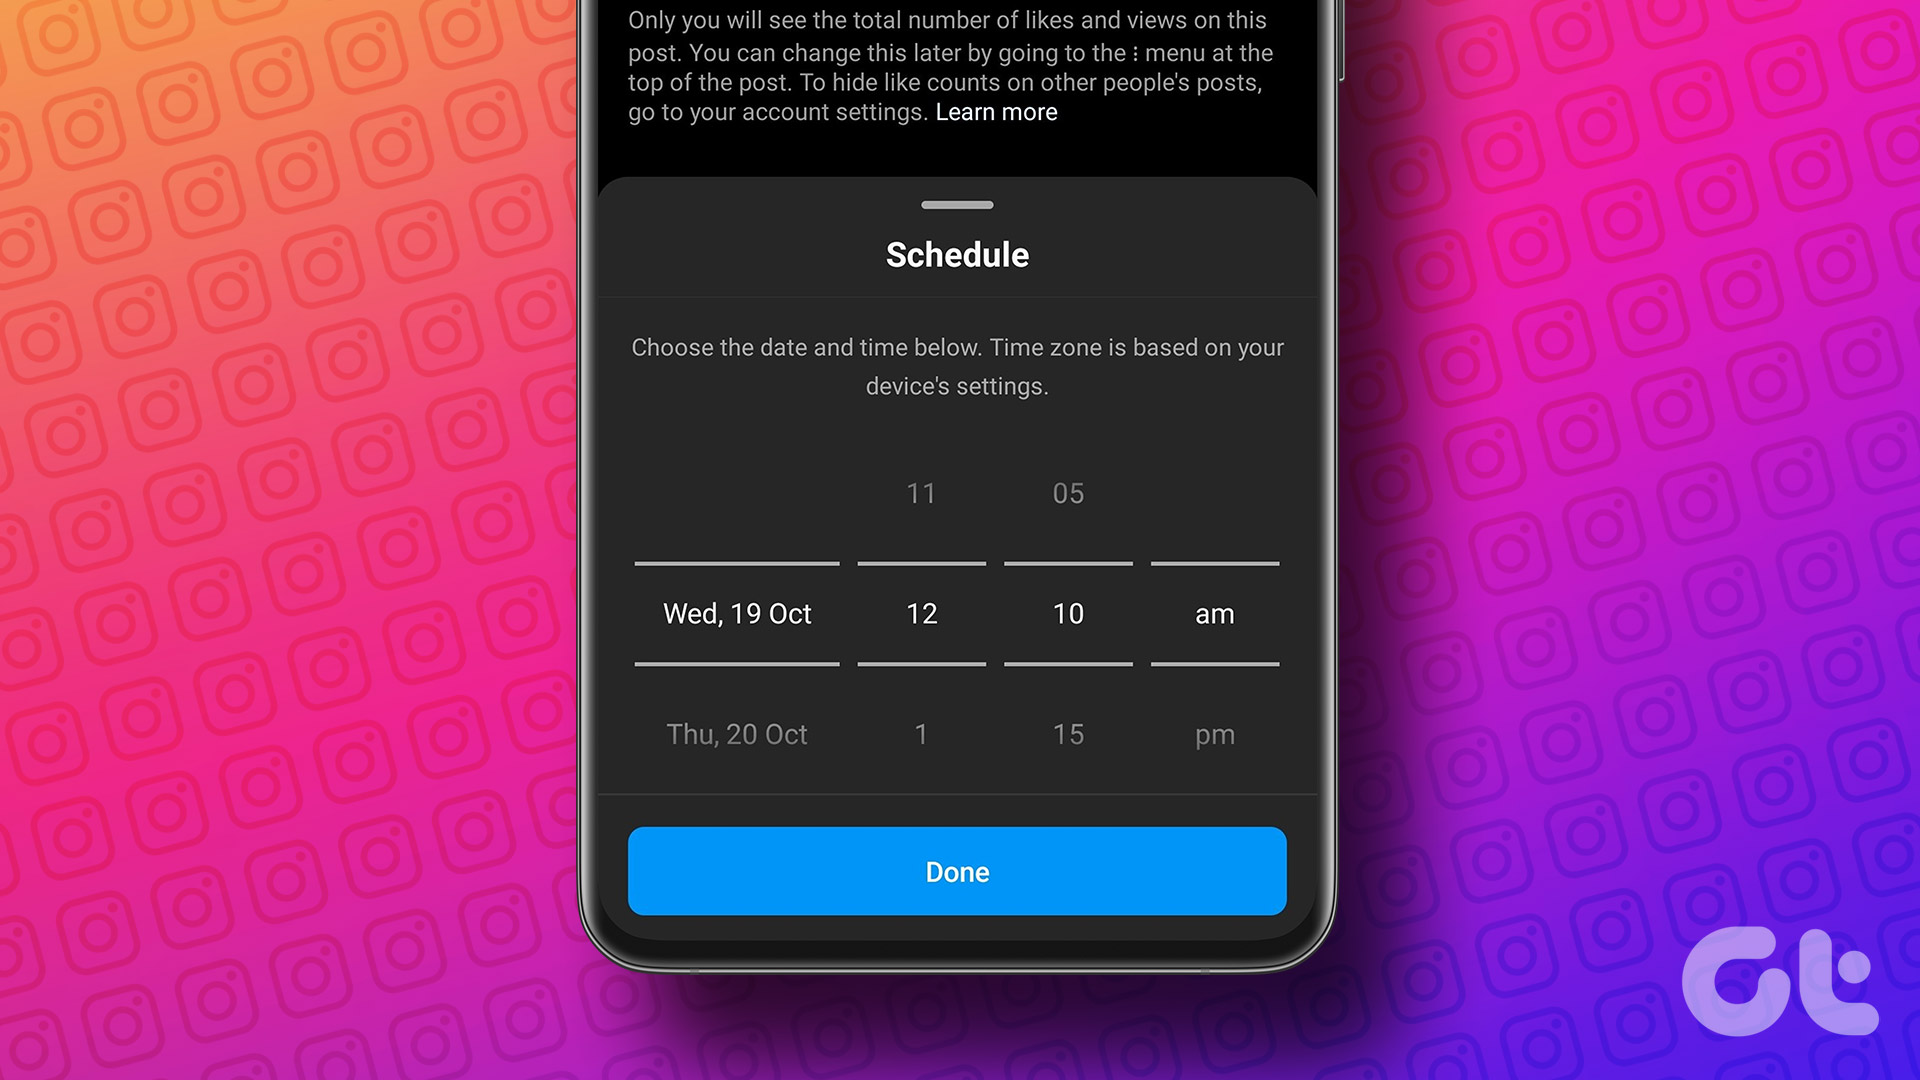
Step 5: Enable the toggle next to ‘Profile this post’. You will now be asked to select the date and time you wish to schedule the post or reel. Select the time you like and hit Set Time.

That’s it! You have successfully set up your post on Instagram.
Create Instagram Posts for Free on Desktop with Studio Creator
If you don’t want to use the Instagram app, or you want to schedule posts on your computer, there are other ways to do it. With this Meta’s Creator Studio tool you can connect your Instagram account to schedule uploads. Here’s how it works.
Note: Before starting with this method, it is important that you have a creator or business account on Instagram. If you are not sure how to get it, check this section above.
Step 1: Check out Meta Creator Studio using the link below.
Step 2: Navigate to the Instagram tab at the top.

Step 2: Select Instagram Login. Now you need to connect your Instagram account.

Step 3: Log in with your Instagram account.

Step 4: Click on ‘Create post’. Then, select the Instagram feed.

Step 5: Upload the image or video you want to post on Instagram. Add relevant information when done. Then, click the arrow next to the Publish button.

Step 6: Select the Program option. You will now be asked to select the date and time you wish to set up your post or reel. Choose according to them.

Step 7: Once you have selected the appropriate date and time, click the Schedule button. Your post will be posted on Instagram at the specified date and time.

You must use a Third Party App to schedule Instagram posts
Since the Instagram app can organize posts and reels, a third-party application is unnecessary. Also, there is no real app that can customize your Instagram ads. An app that can send you reminders to post your picture at a certain date and time. If you still want to use a third-party app, you can use an app like Planoly to do so.
How to schedule ads on Instagram using Planoly
Step 1: Install Planoly from the Play Store or App Store on your device.
Step 2: Select Create Account. Enter your credentials and sign in.


Step 3: Click the Instagram Link to link your account to Planoly. Then, select Instagram Link once again.


Step 4: Select the required permissions and click Submit.

Step 5: Choose the appropriate option depending on the account you manage. If it’s your personal account select ‘My account’. Then, select the category of your account and hit Continue.


Your Planoly account is now set up. Here’s how you can start organizing your ads.
Step 6: Click on the ‘+’ sign in the bottom bar. Now, select album.


Step 7: Select the folder with your photo. After that, select the image you want to upload and click Add.


Step 8: Click Upload. Your photo will be uploaded to Planoly but not to Instagram.

Step 9: Choose the photo you uploaded. Enter the label and all relevant information.

Step 10: Turn on the toggle next to ‘Set up a reminder notification’.

Step 11: You will see a calendar to set the date and time. Select the relevant information and click Next.

Step 12: Finally, click Save.

Step 13: Once selected, you will receive a notification from Planoly. Click on it and you will be sent to the designated column for posting. Now, tap on Post Now.
Your photo will be posted on Instagram with a caption included and all the information.
FAQs for Editing Instagram Posts
Since the customization feature is only available for business accounts and creators, you can’t customize ads unless you have a separate Instagram account.
Instagram allows you to schedule ads up to 75 days in advance.
No, there is no limit to the number of posts you can set up with the official Instagram app. If you’re using a third-party app, there may be limits on free versions.
Yes, you can edit a previously scheduled post while it’s live. Just go to the app and select the scheduled message to send. You can cancel the upload from here or change the scheduled date/time.
Don’t miss an Upload
If you are a content creator, posting regularly is very important. This is exactly where the customization feature can come in handy. Easily organize your Instagram posts on your phone, whether they’re photos or videos, and make sure followers get the content they want at the right time.
[ad_2]
Source link