

[ad_1]
Android Debug Bridge, or ADB, is a utility that you can use to debug your Android device, sideload apps, and install custom ROMs. One of our favorite uses of ADB is to remove bloatware from Android smartphones, making them run faster and freeing up storage space occupied by unwanted apps. You can use ADB on your Android device using any device running Windows, macOS or Linux, or one of the best Chromebooks. And if your Android smartphone is Android 11 or higher, you can use ADB wirelessly.
The best part is that wireless ADB is easy to set up and use, and you don’t need to be an Android developer to make it work. If you don’t know how to set up wireless ADB on your Android phone, follow this tutorial to learn how to do it.
How to use ADB wirelessly on your Android phone
Generally, users use a USB cable to send ADB commands through a USB connection. But wireless ADB has gotten a lot better, and now you don’t need to use a wire to execute ADB commands on your Android device. However, before proceeding, follow these steps:
- Connect your computer and Android phone to the same Wi-Fi network.
- Update your Android device to the latest version and make sure it is running Android 11 or higher.
- Download the latest version of Android SDK Platform-Tools to your computer.
Unless you are an Android developer and you don’t need to install Android Studio to test your apps. After completing the basic requirements, follow the steps below to install and use Wi-Fi ADB on your Android phone.
If you use an older Android smartphone running Android 10 or lower, use the older one adb tcpip command method. You can check the steps of this method from Android Developers official page.
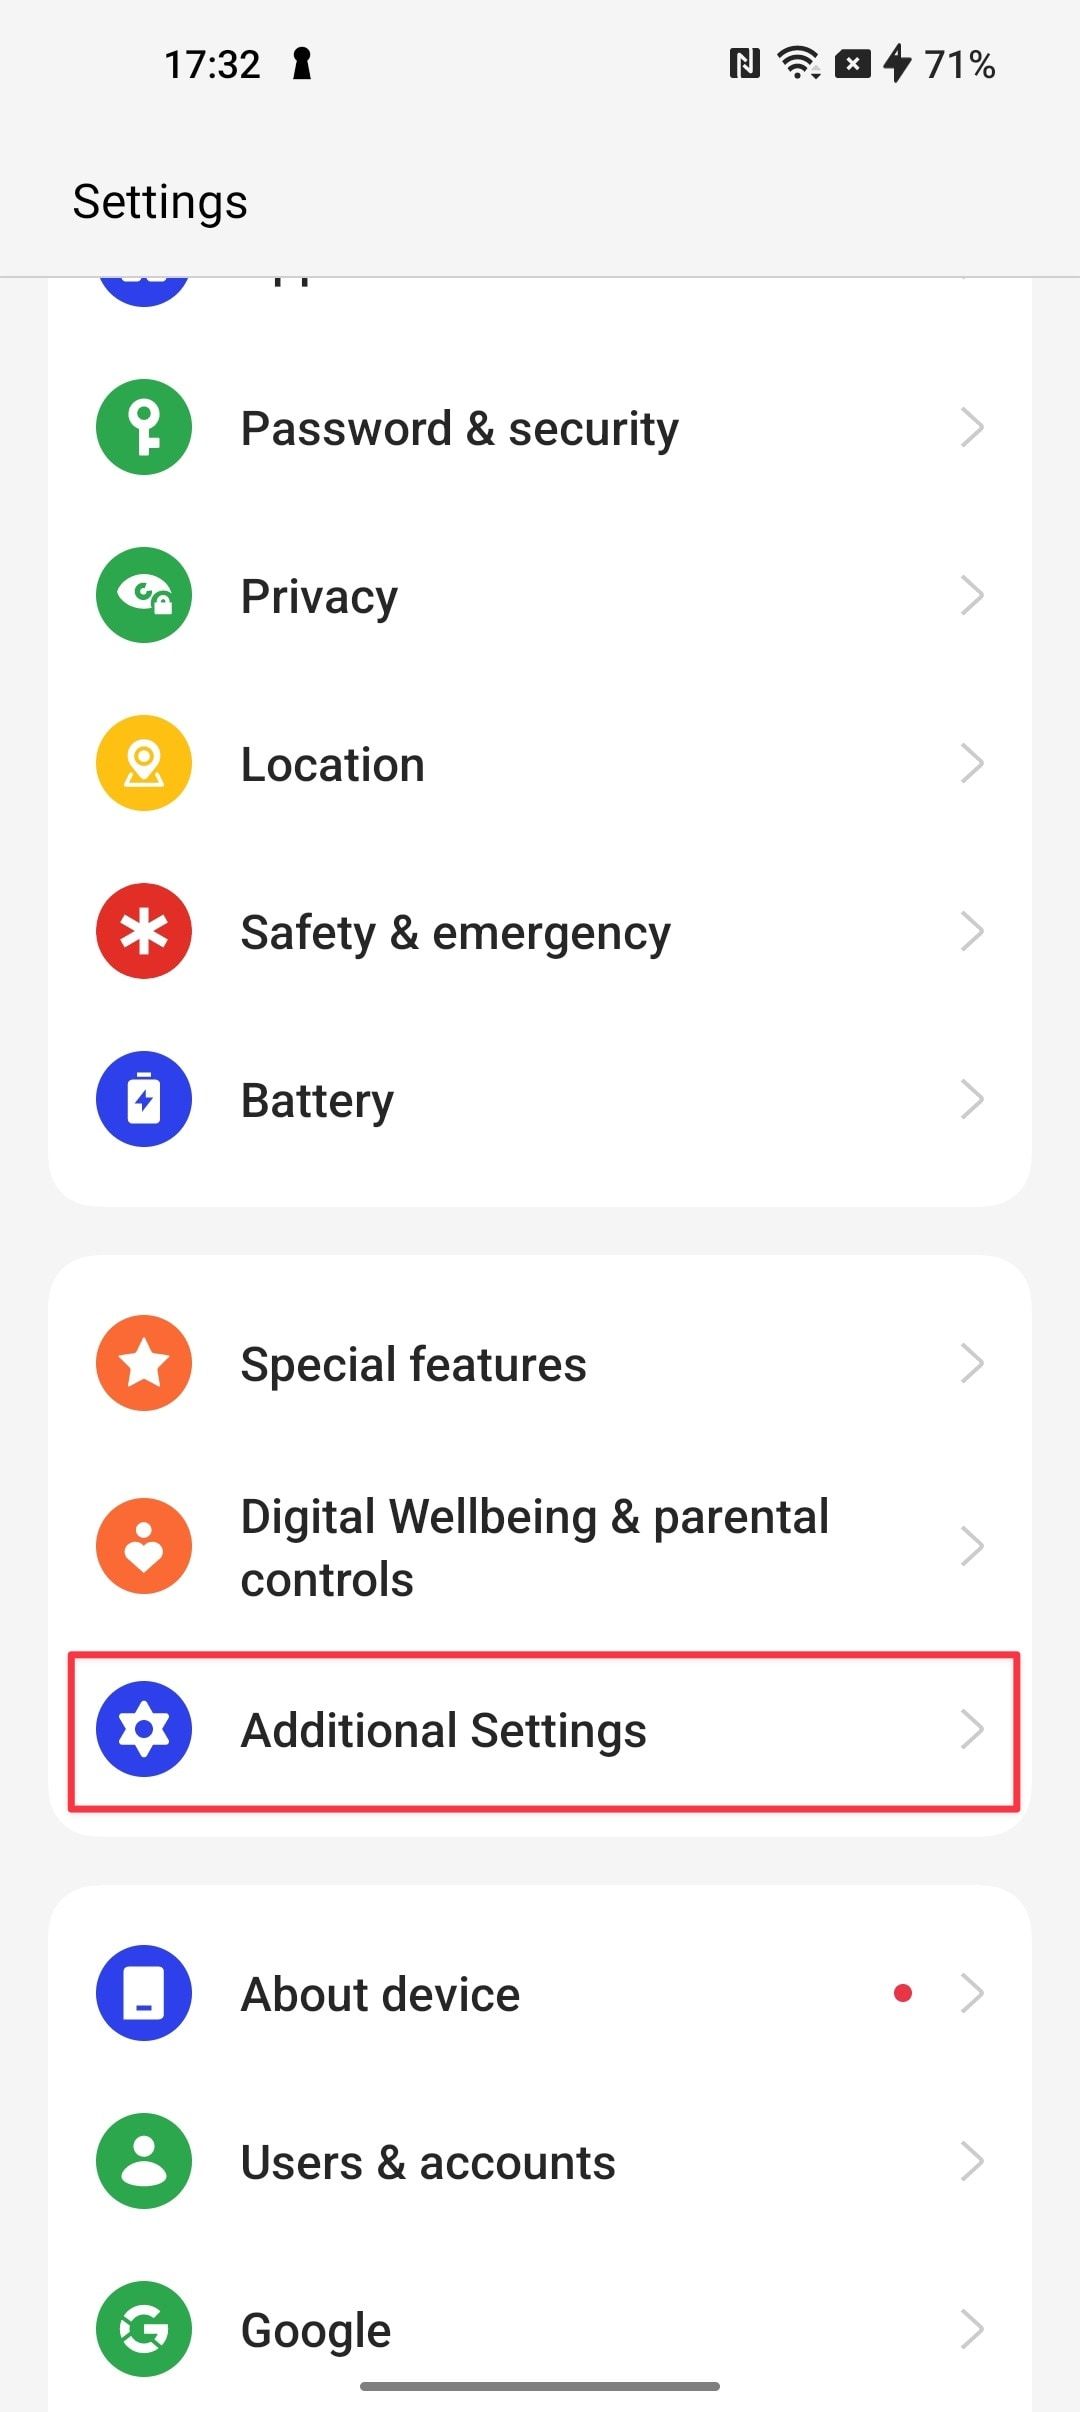
Enable Developer options on your Android device
Before using Wi-Fi ADB on your Android smartphone, you need to configure your Android device to enable Developer Options. The steps may be slightly different depending on the brand of your smartphone.
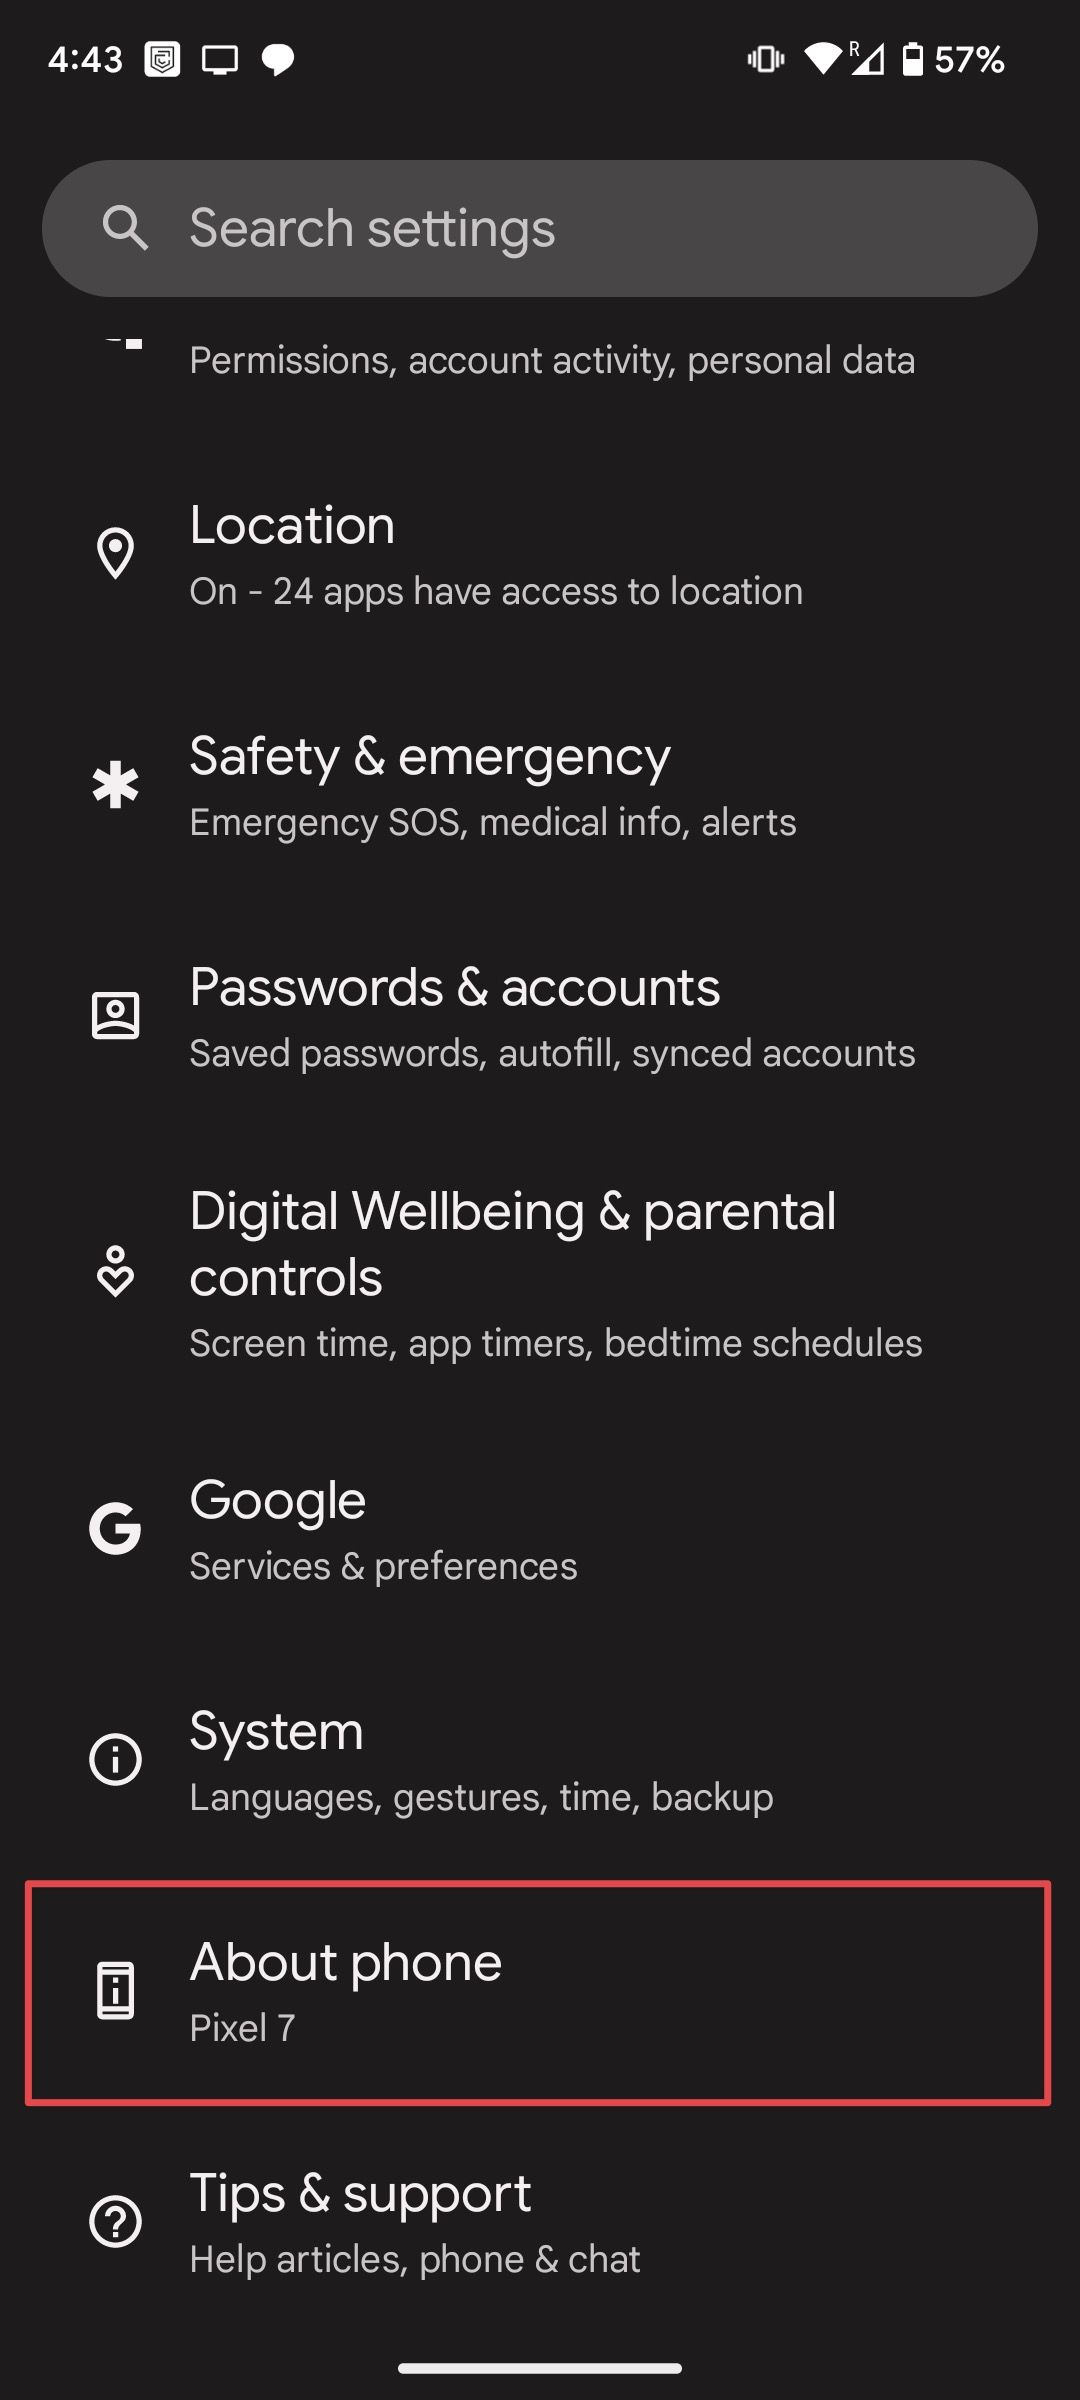
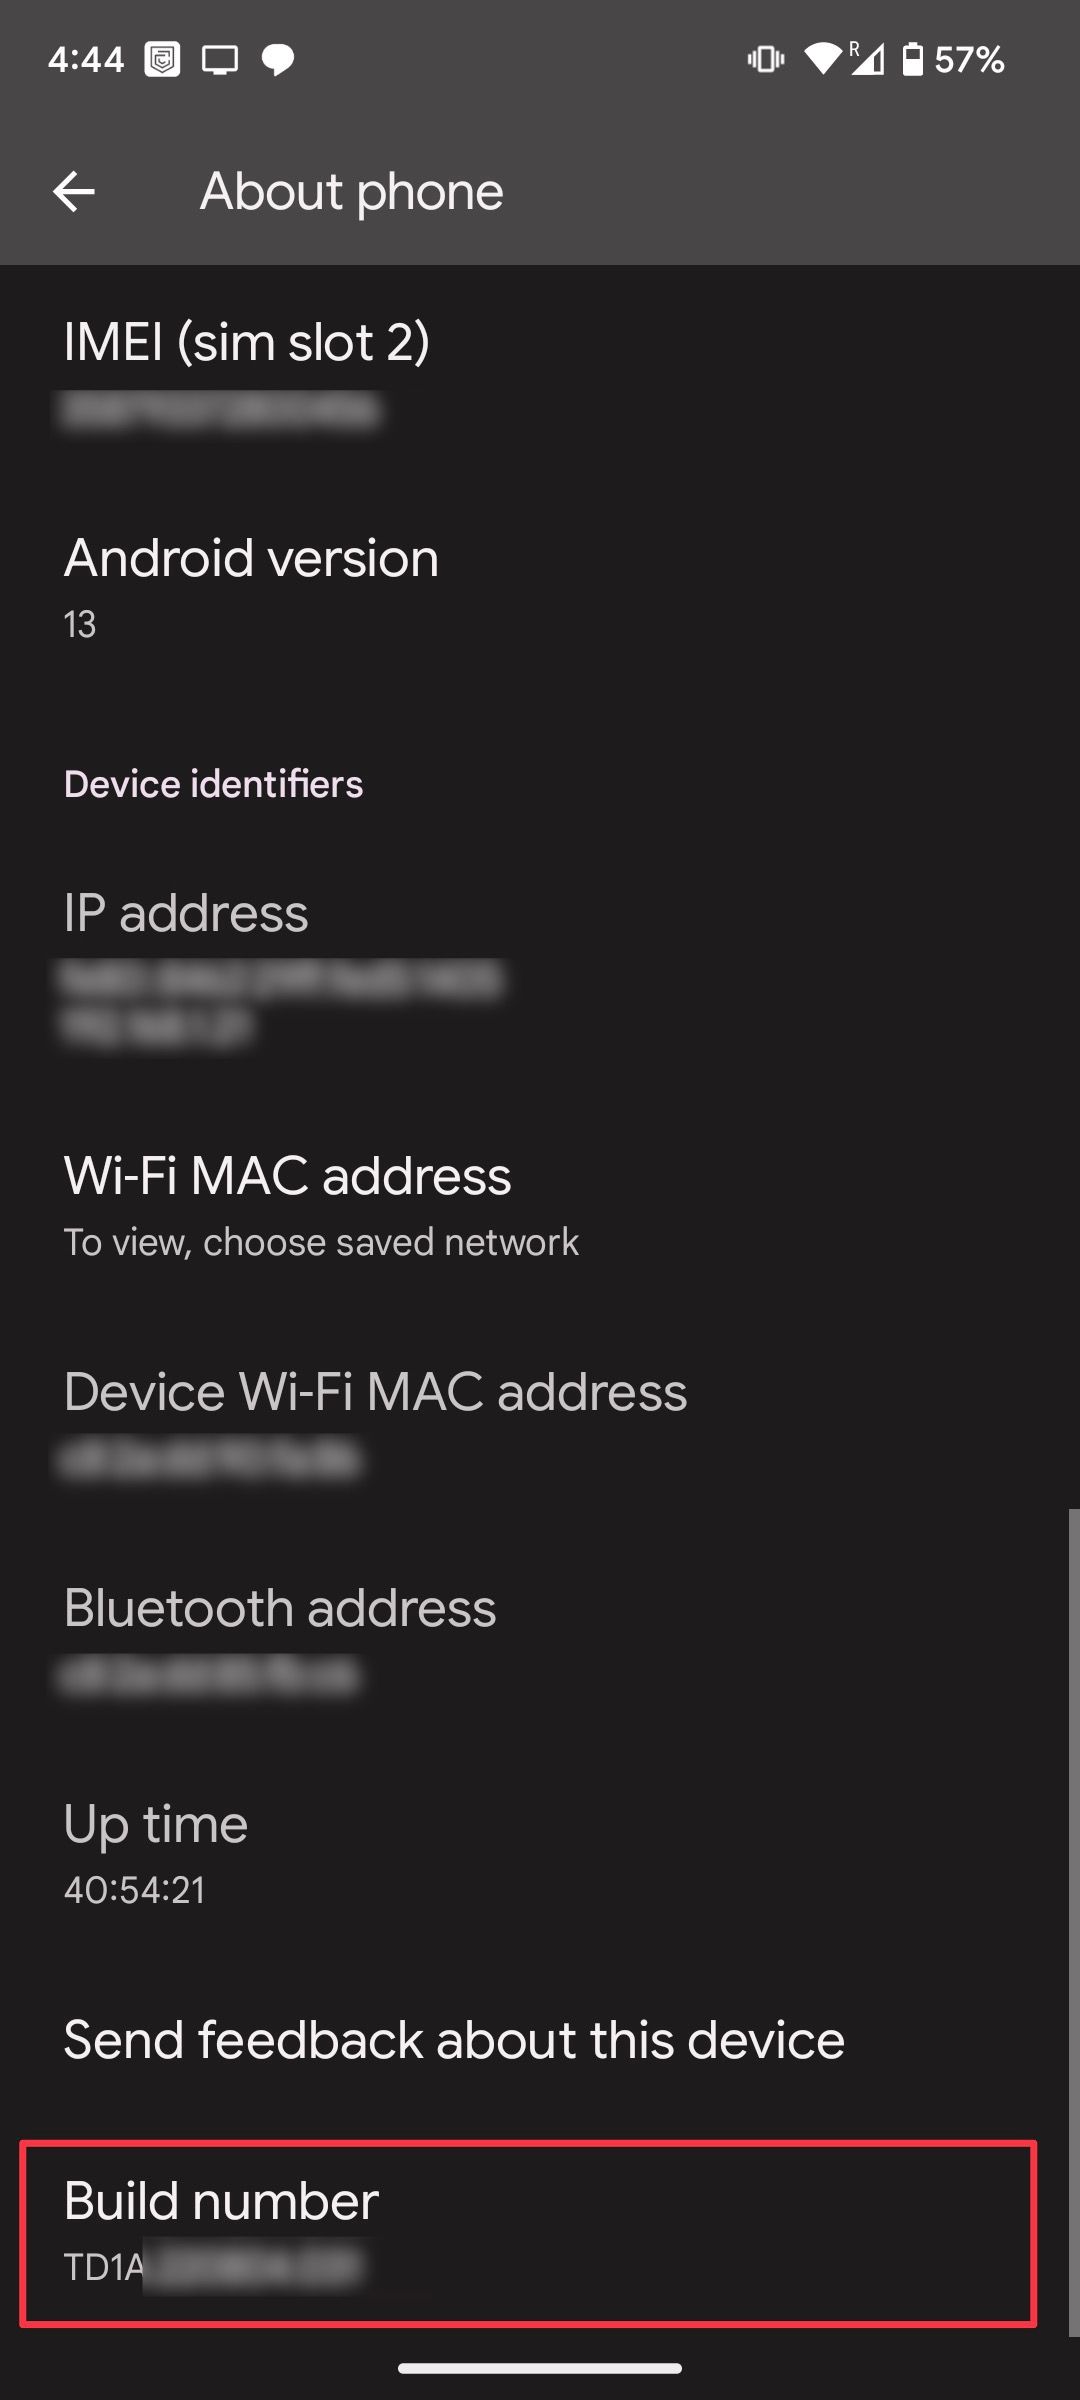
- To enable Developer Options on your Google Pixel, go to: Settings > About the phone > Build number. Tap Build number “You are now a developer!”
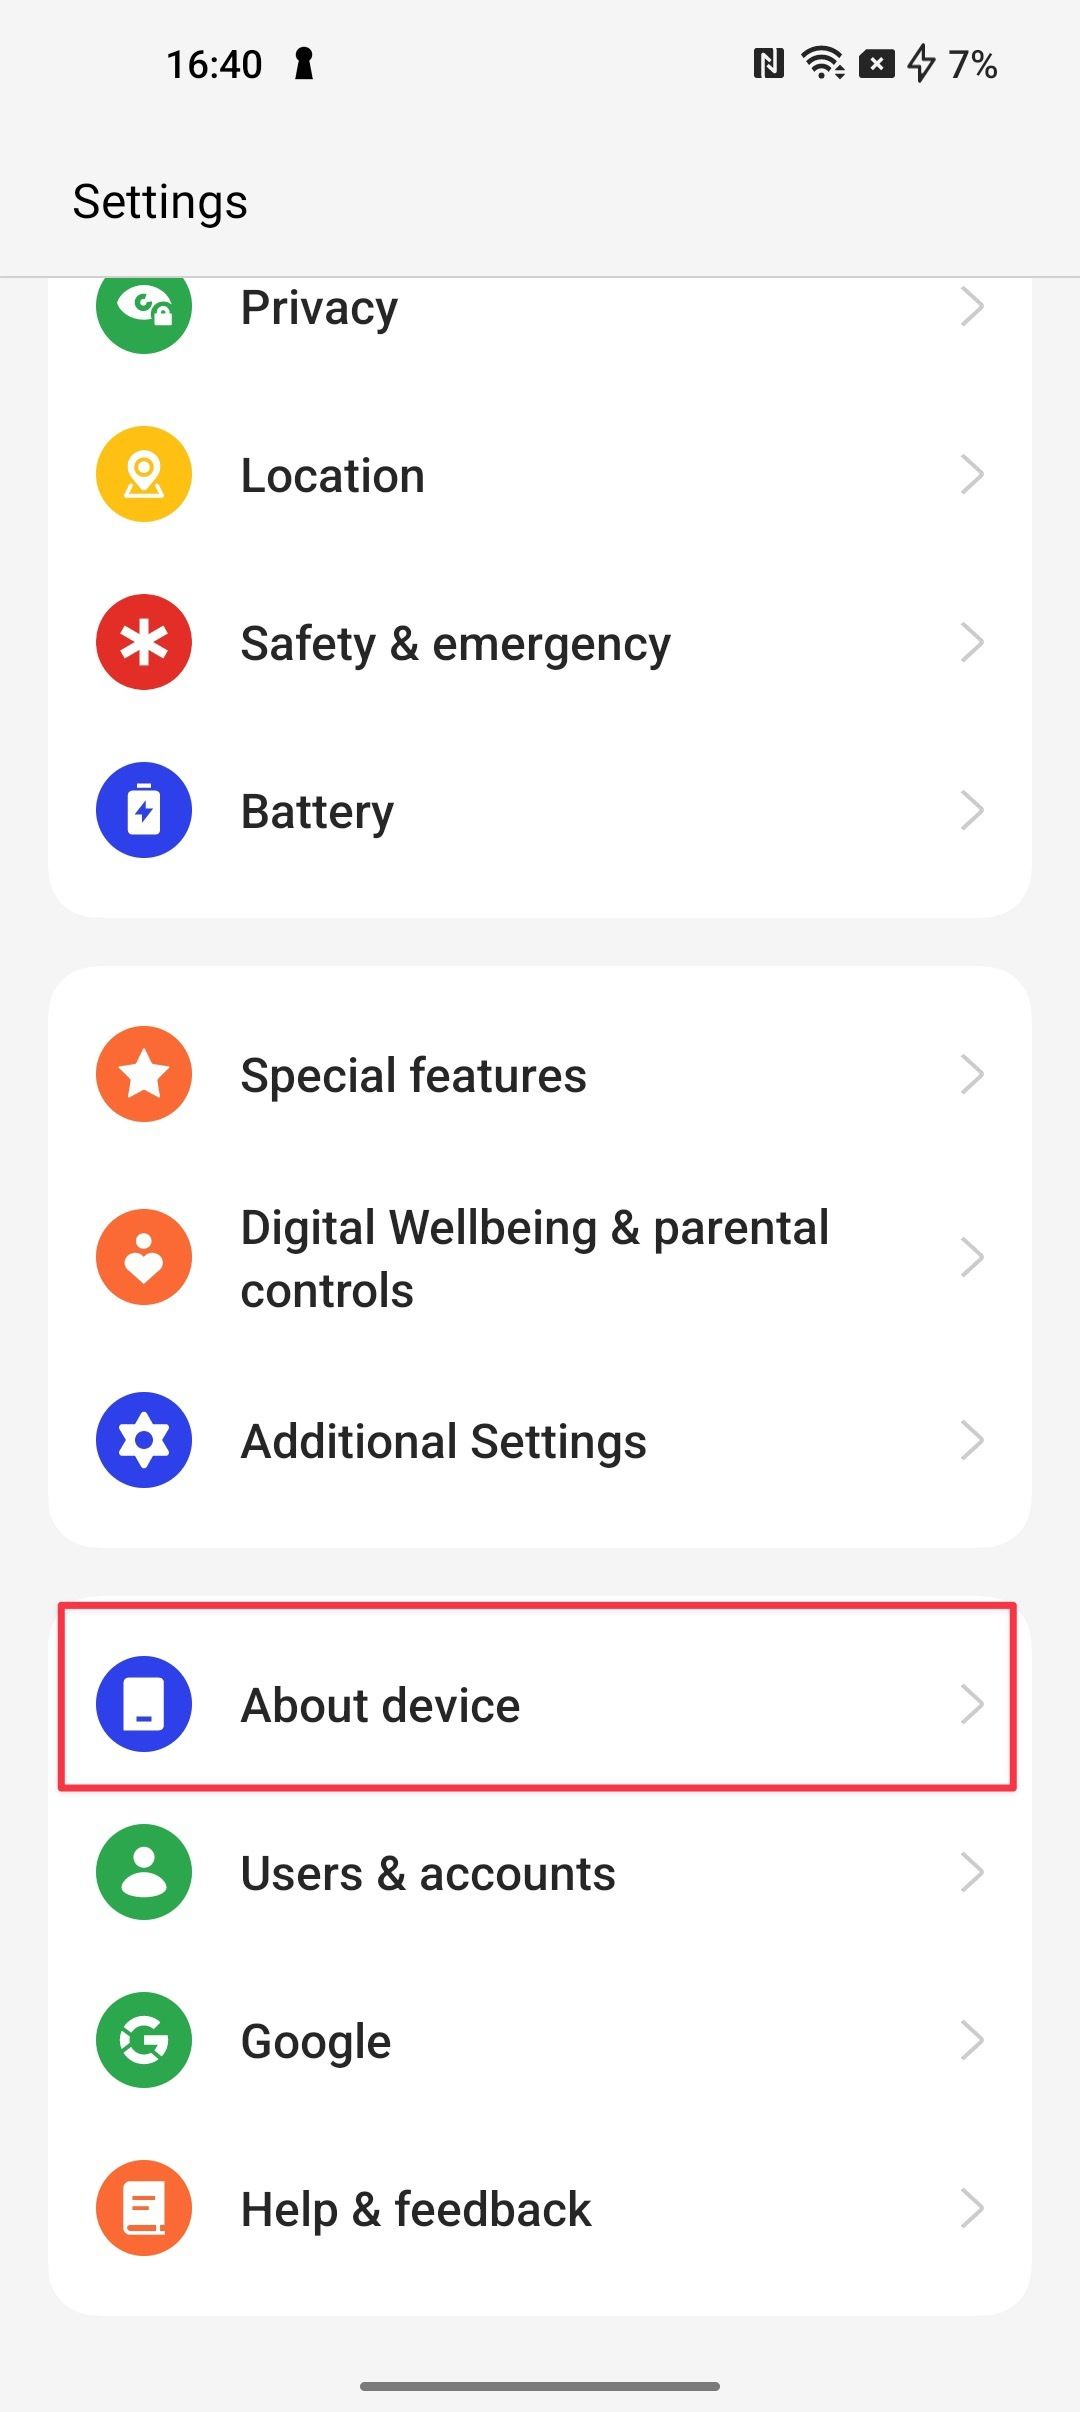
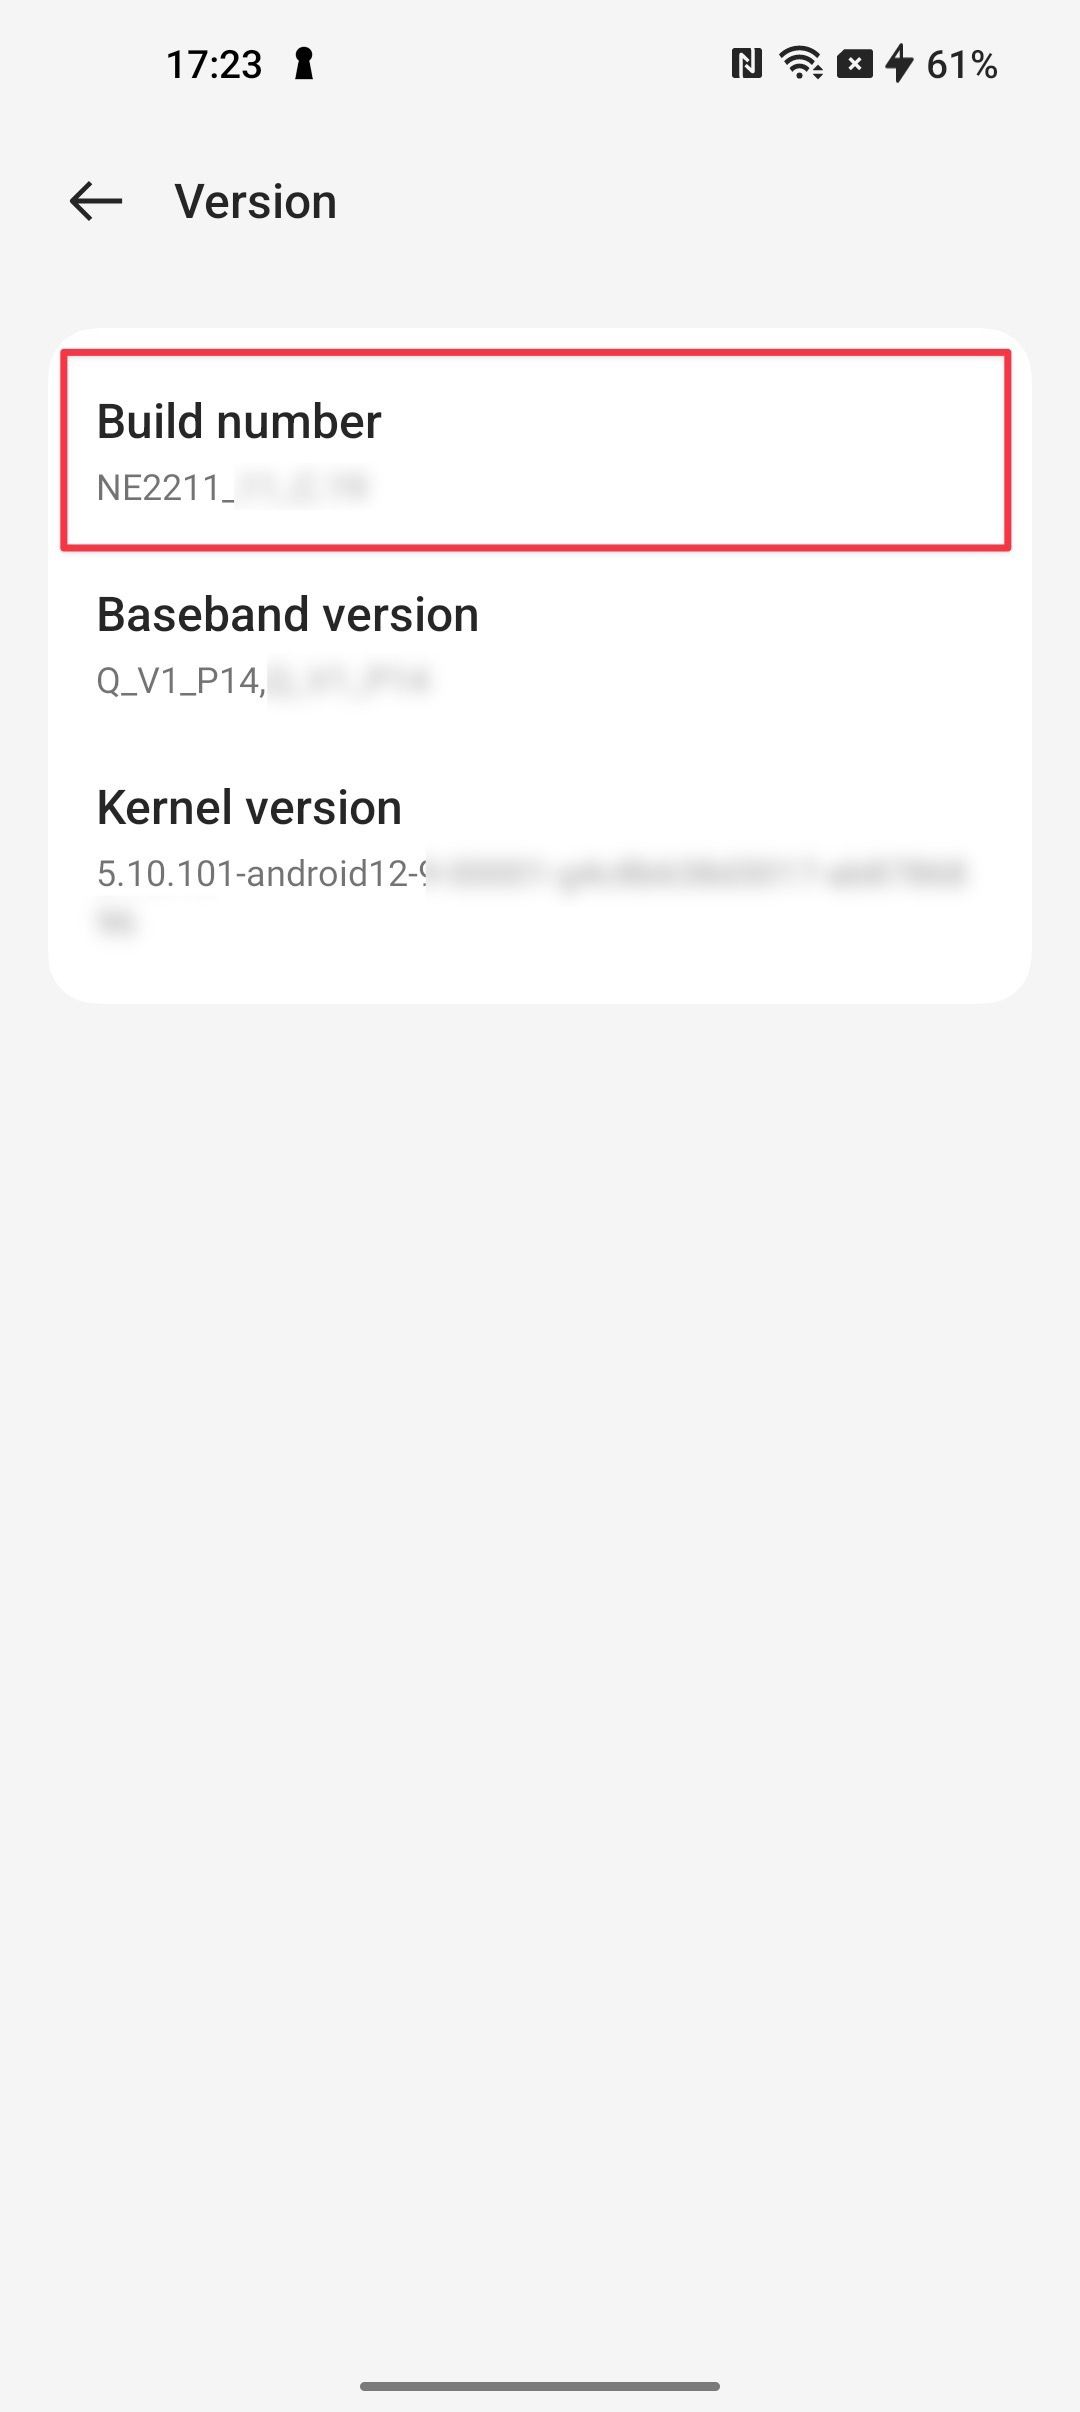
- If you own one of the new OnePlus devices, head over to Settings > About the device > Version.
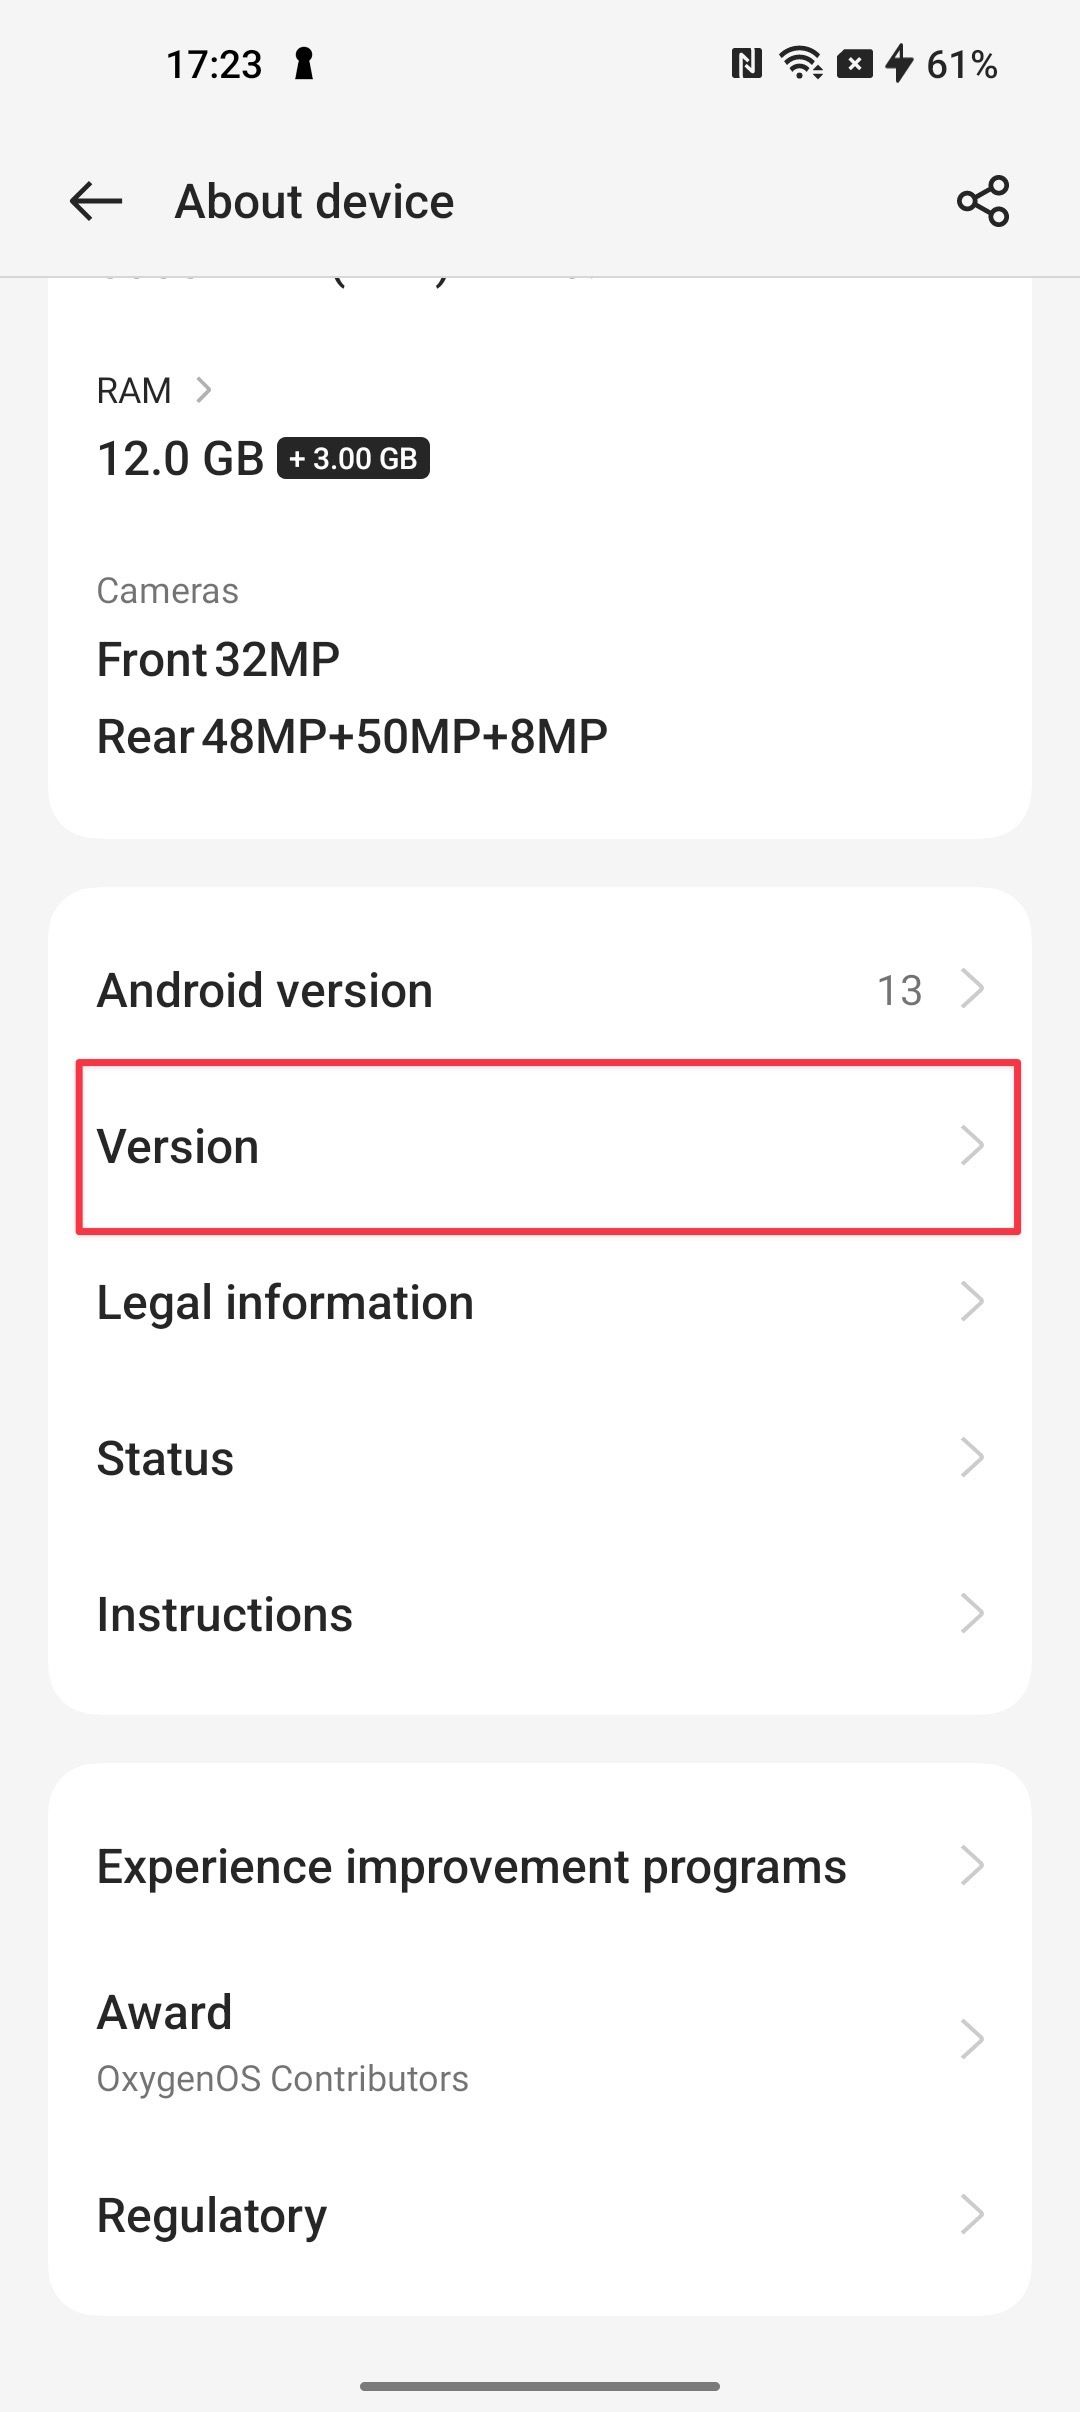
- tap Build number seven times until you see the same message.
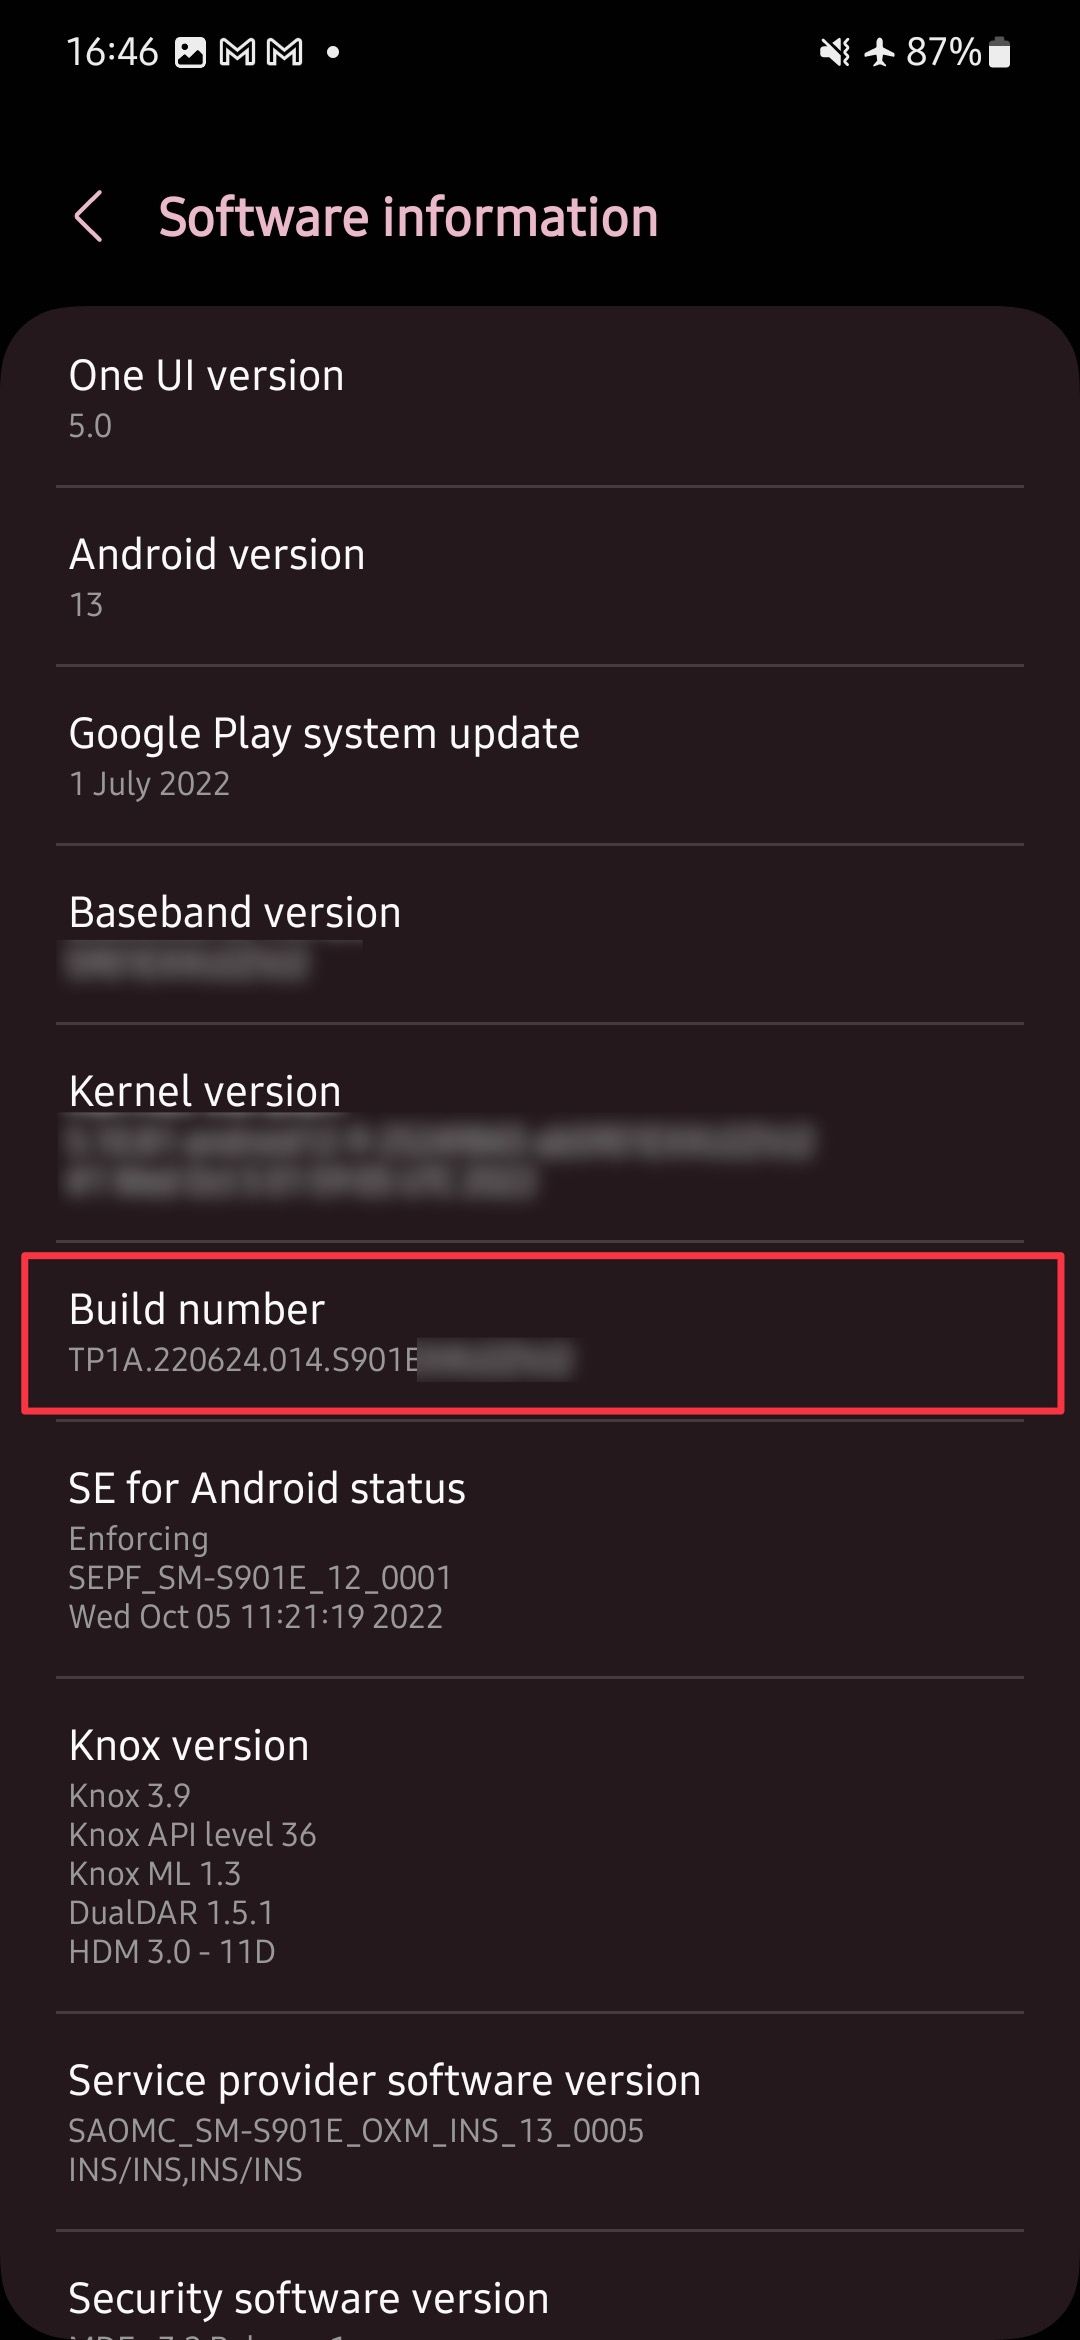
- Go for Samsung smartphones Settings > About the phone > Software Information.


- tap Build number “You are now in Developer Mode!”


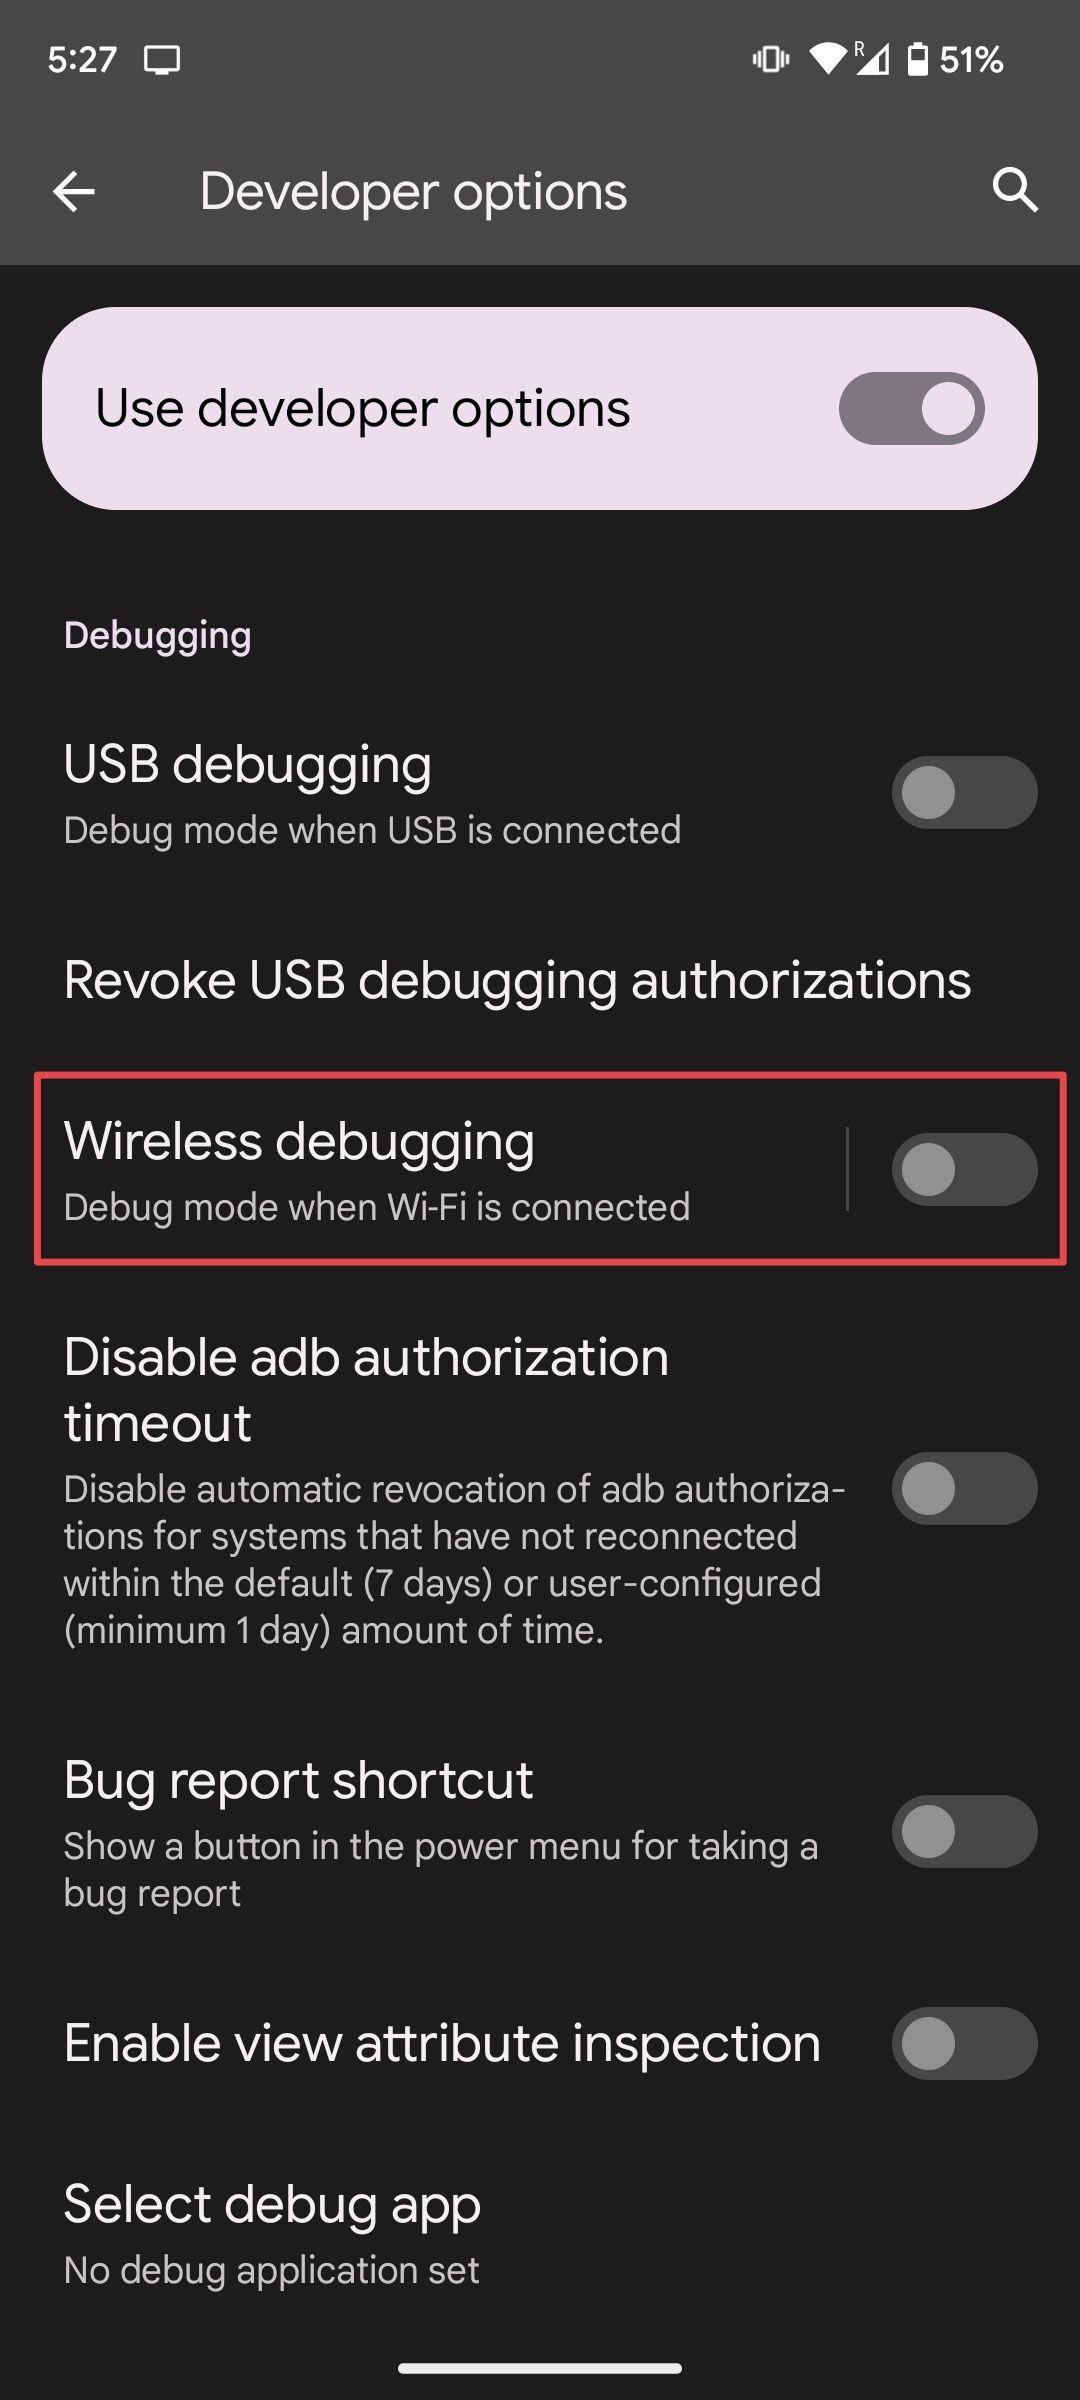
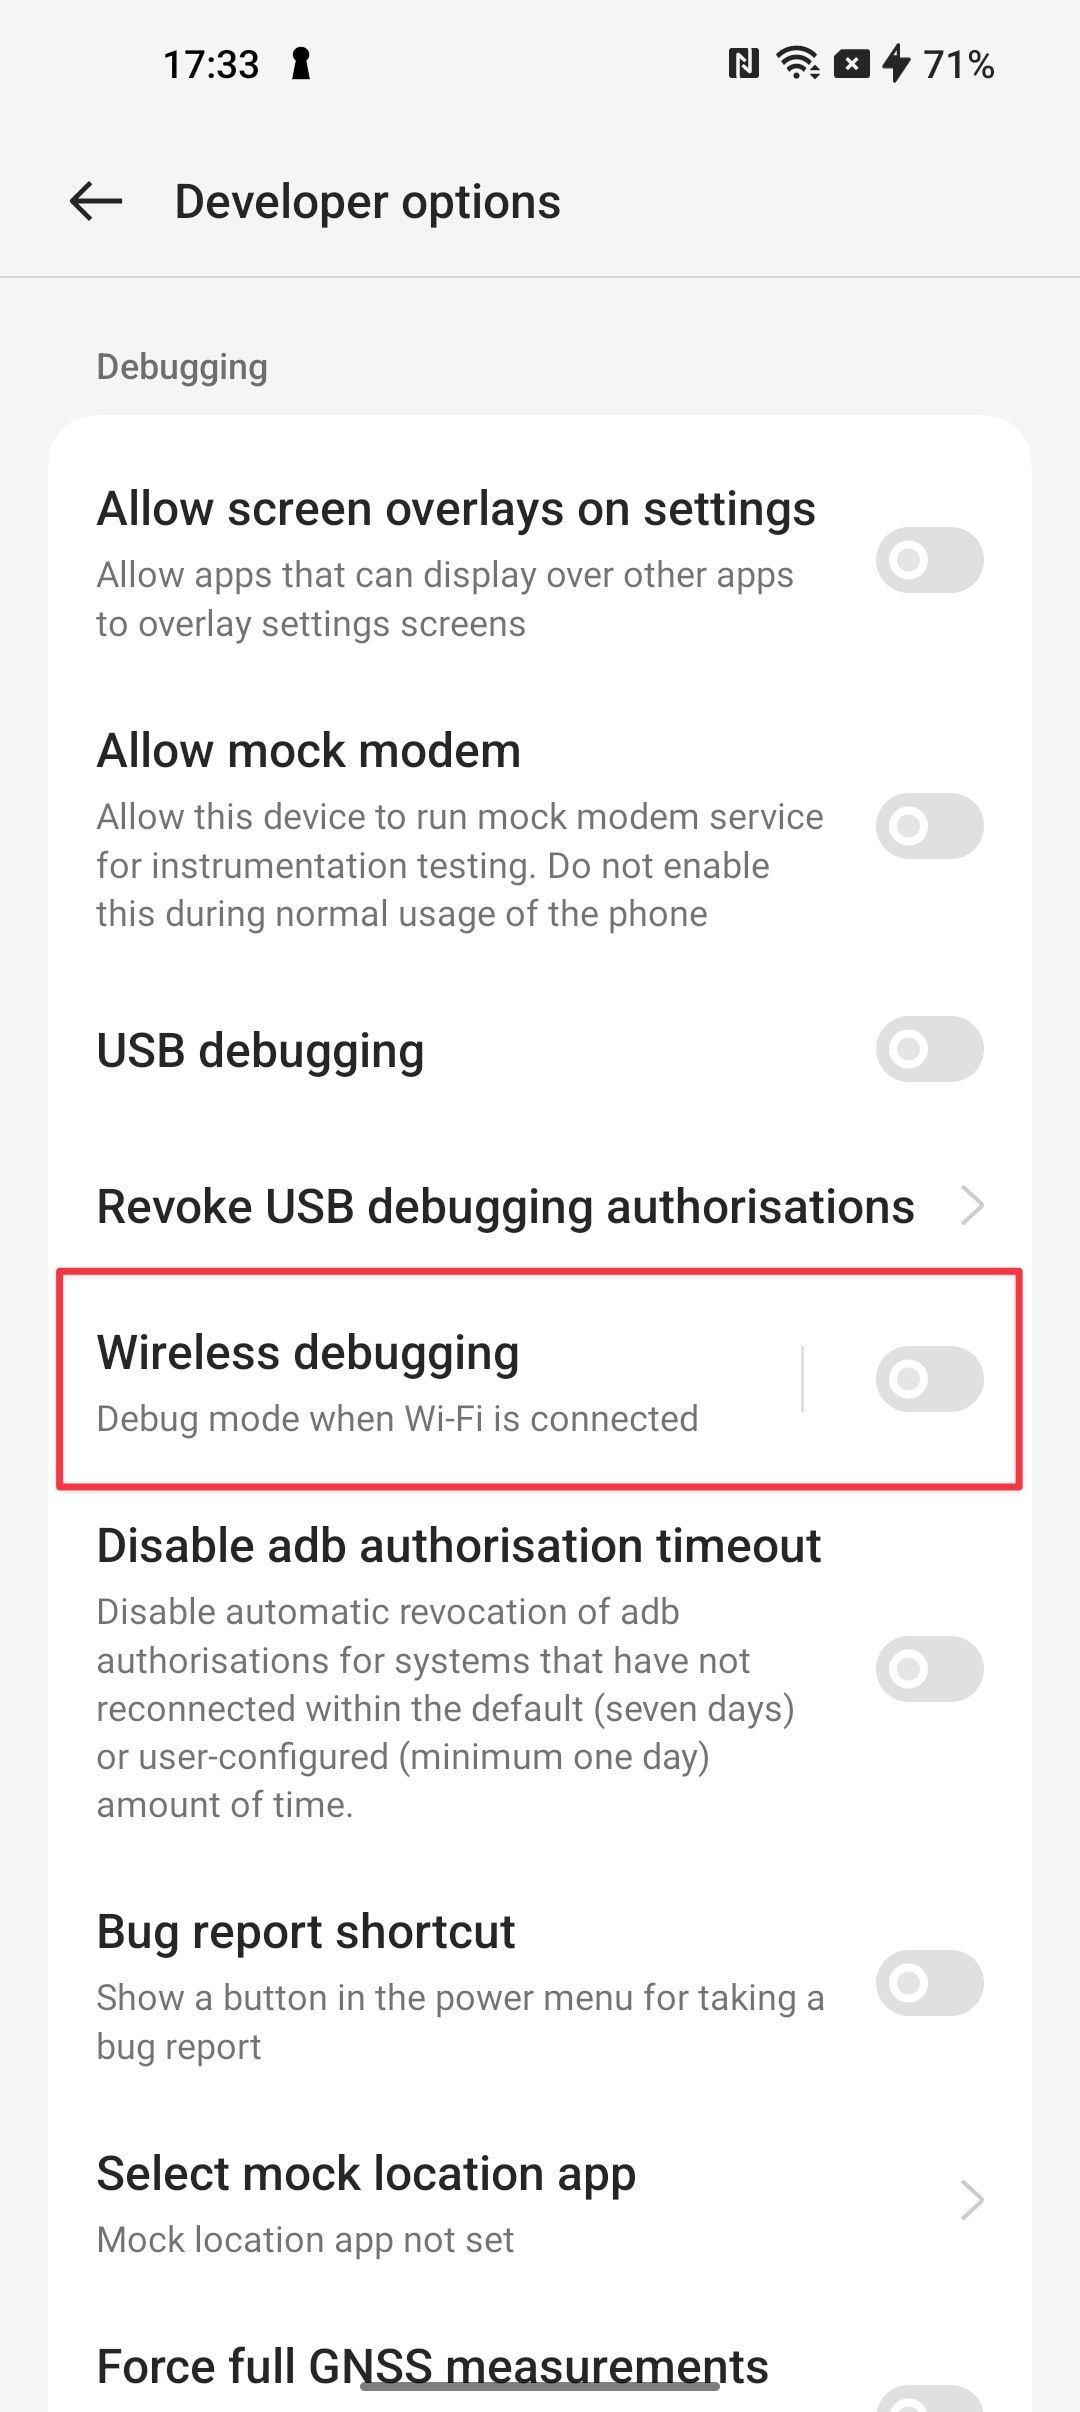
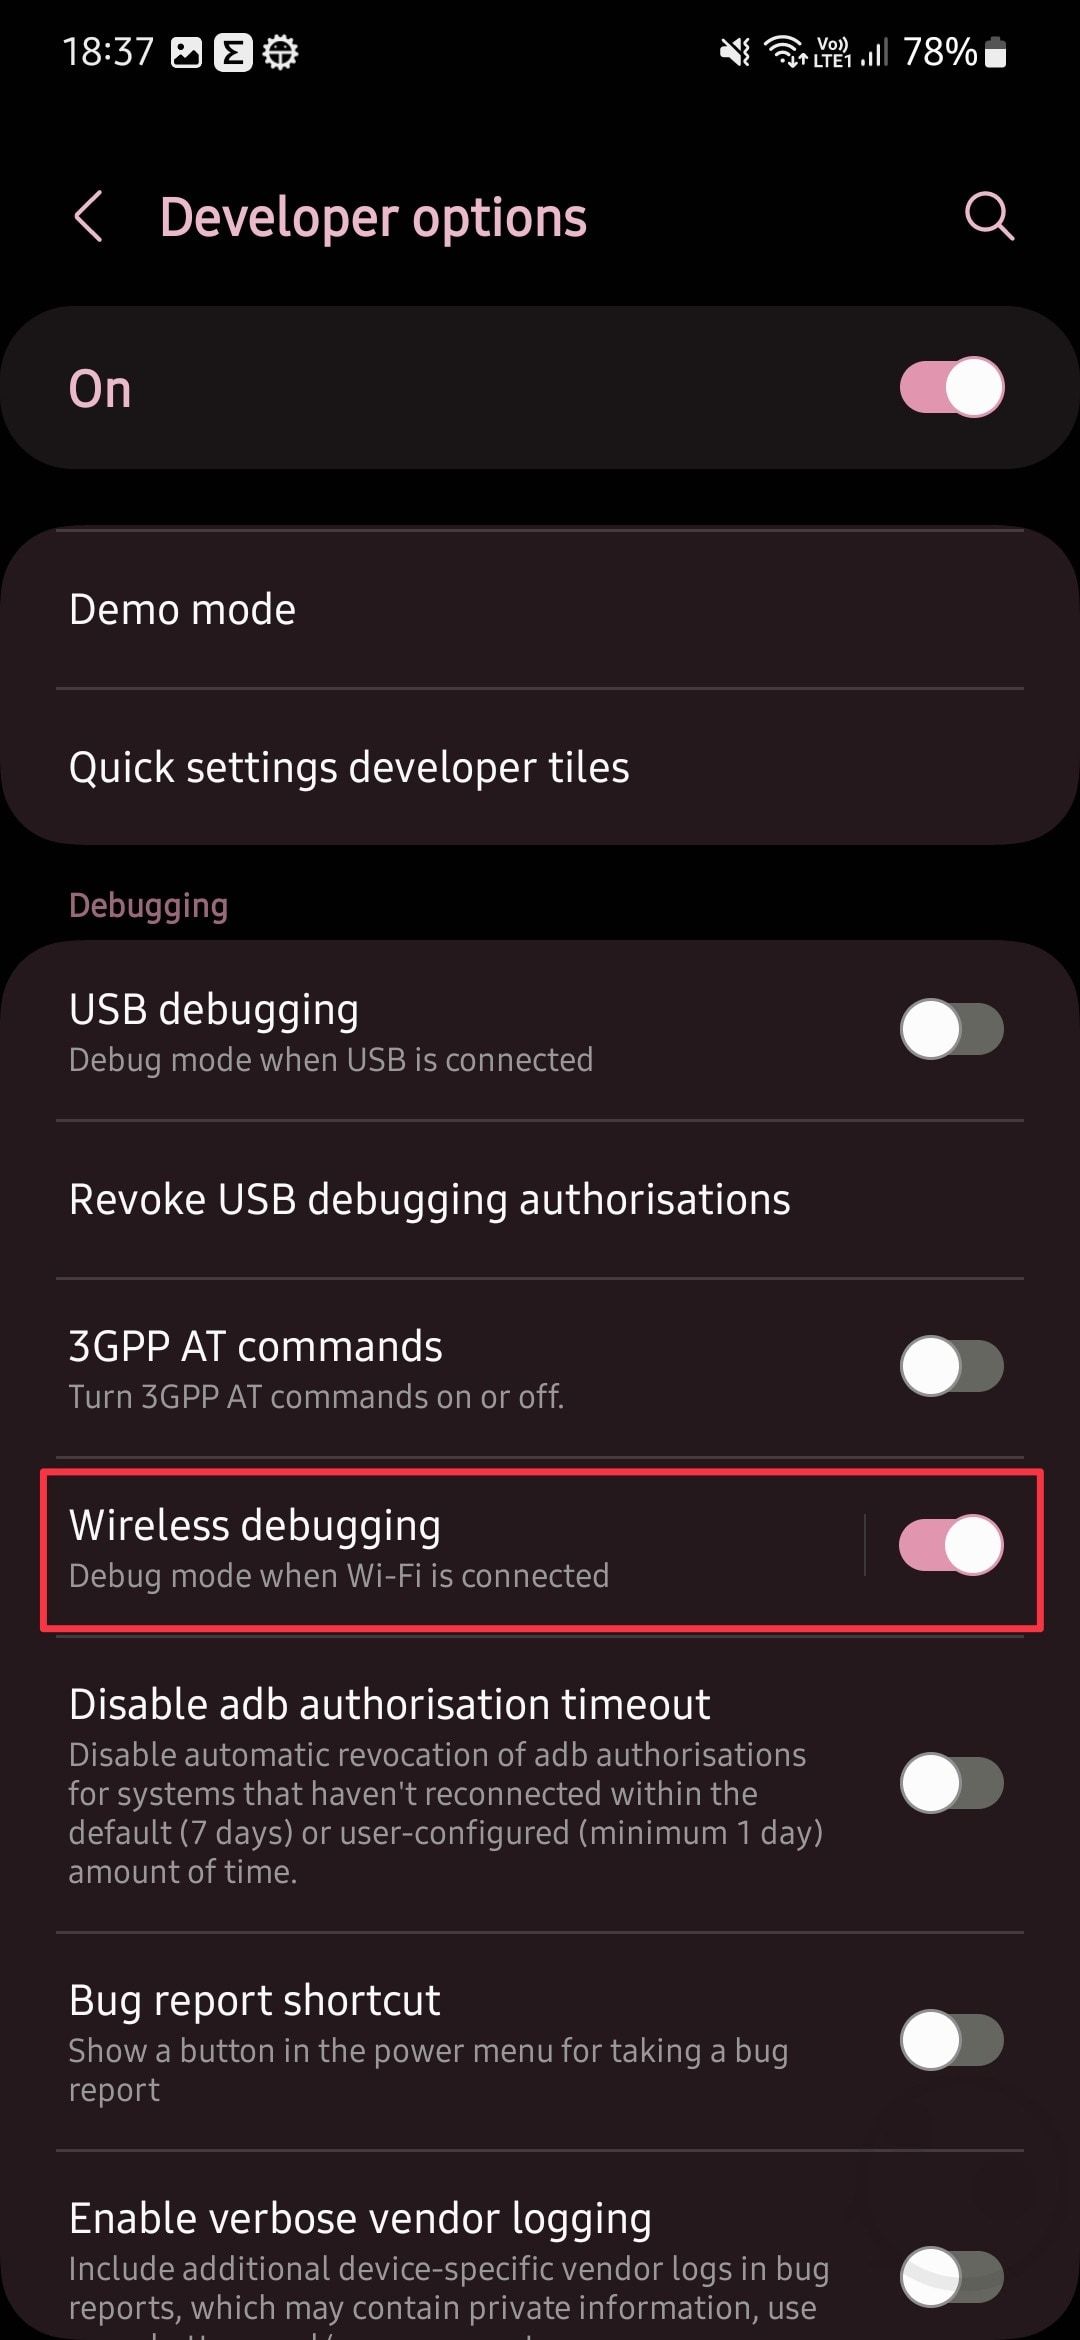
Enable wireless debugging on your Android device.
Now that you have enabled Developer options, you need to enable wireless debugging on your Android device.
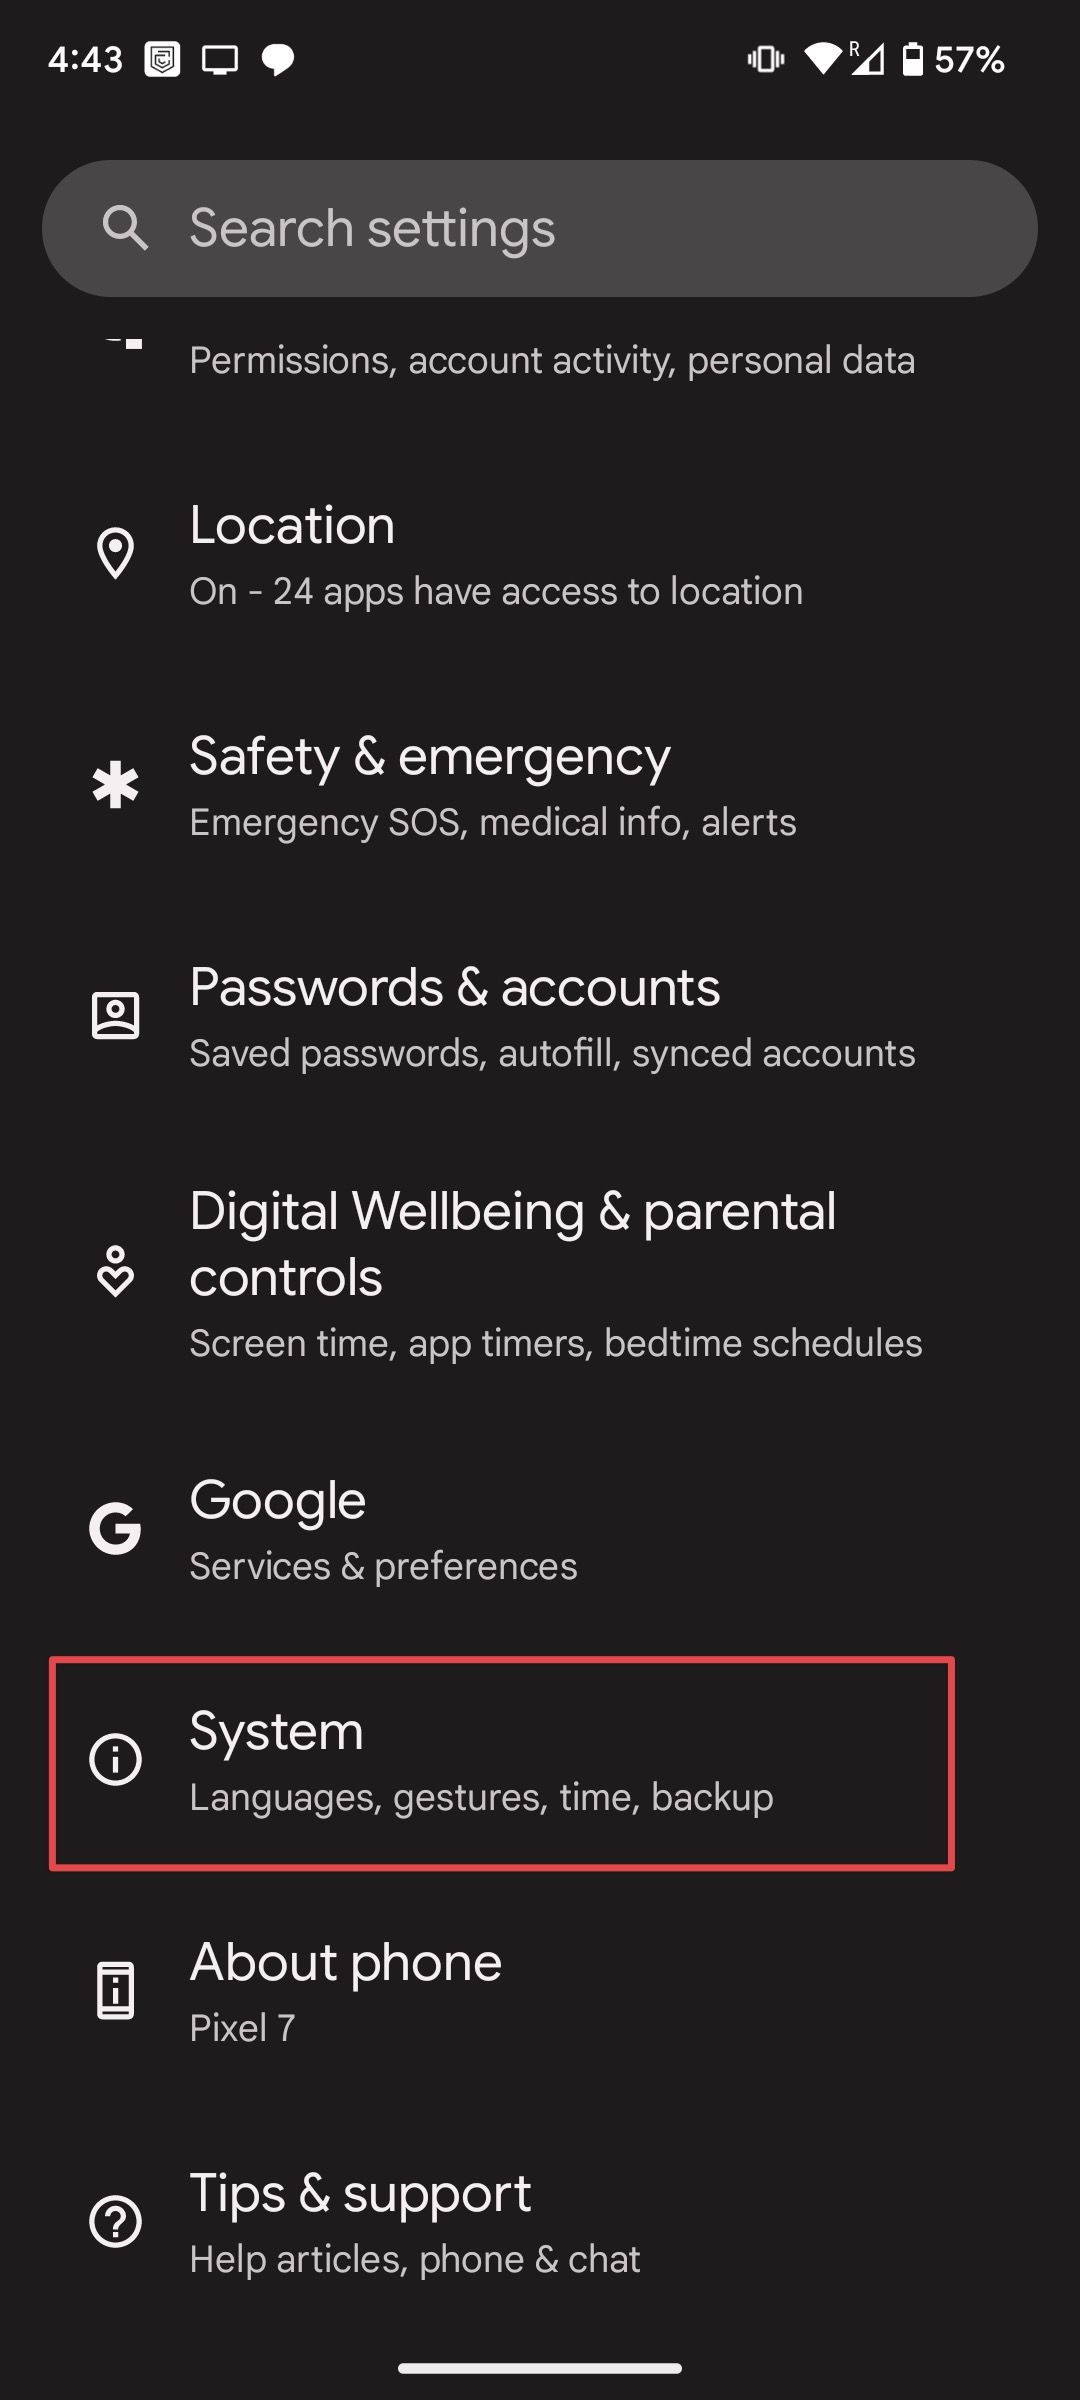
- To enable wireless debugging on Google Pixel, go below Settings > System and open Developer options.
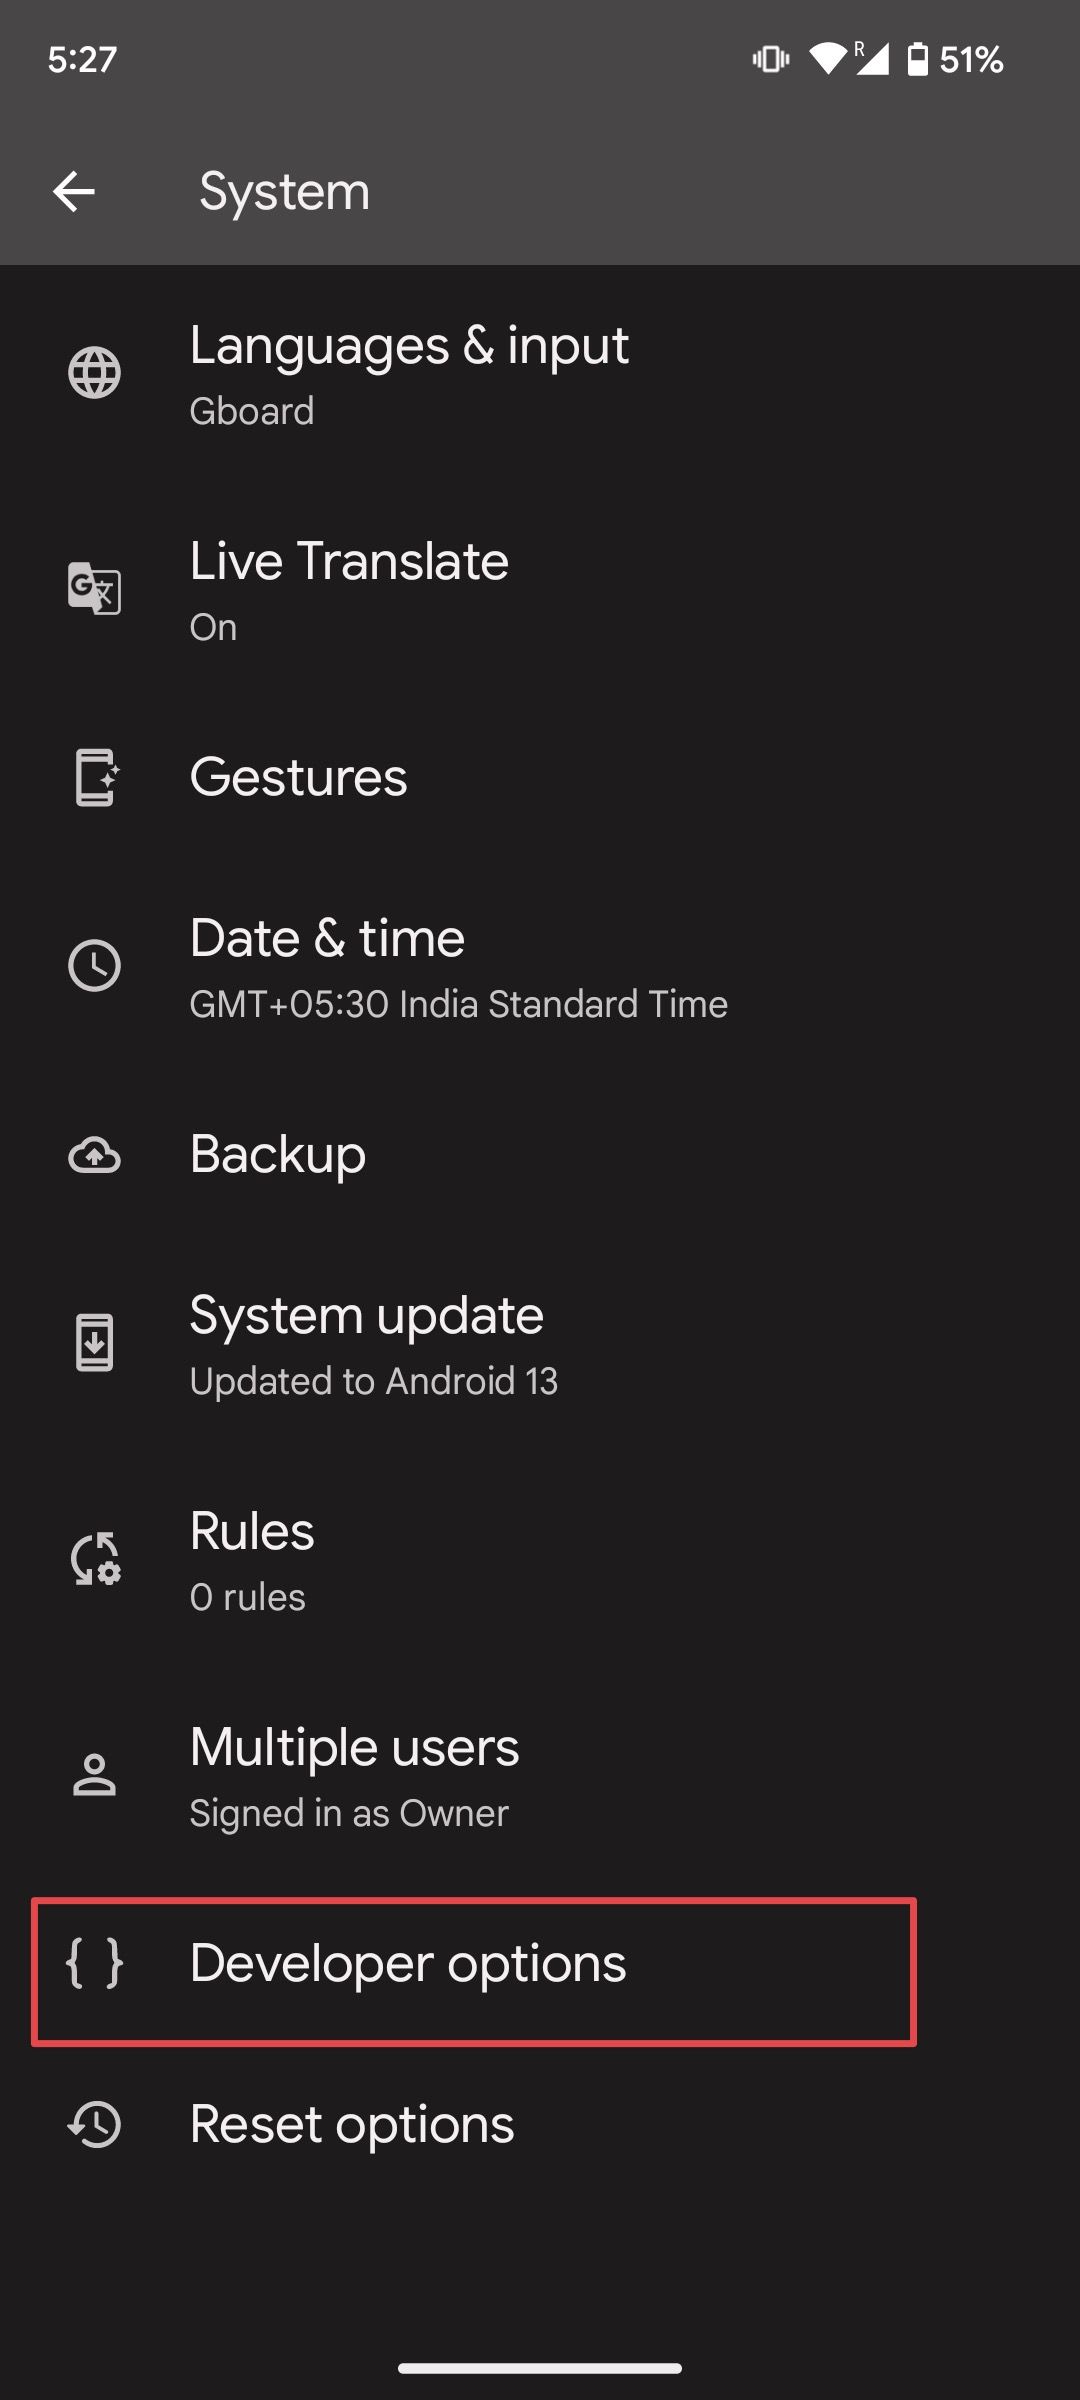
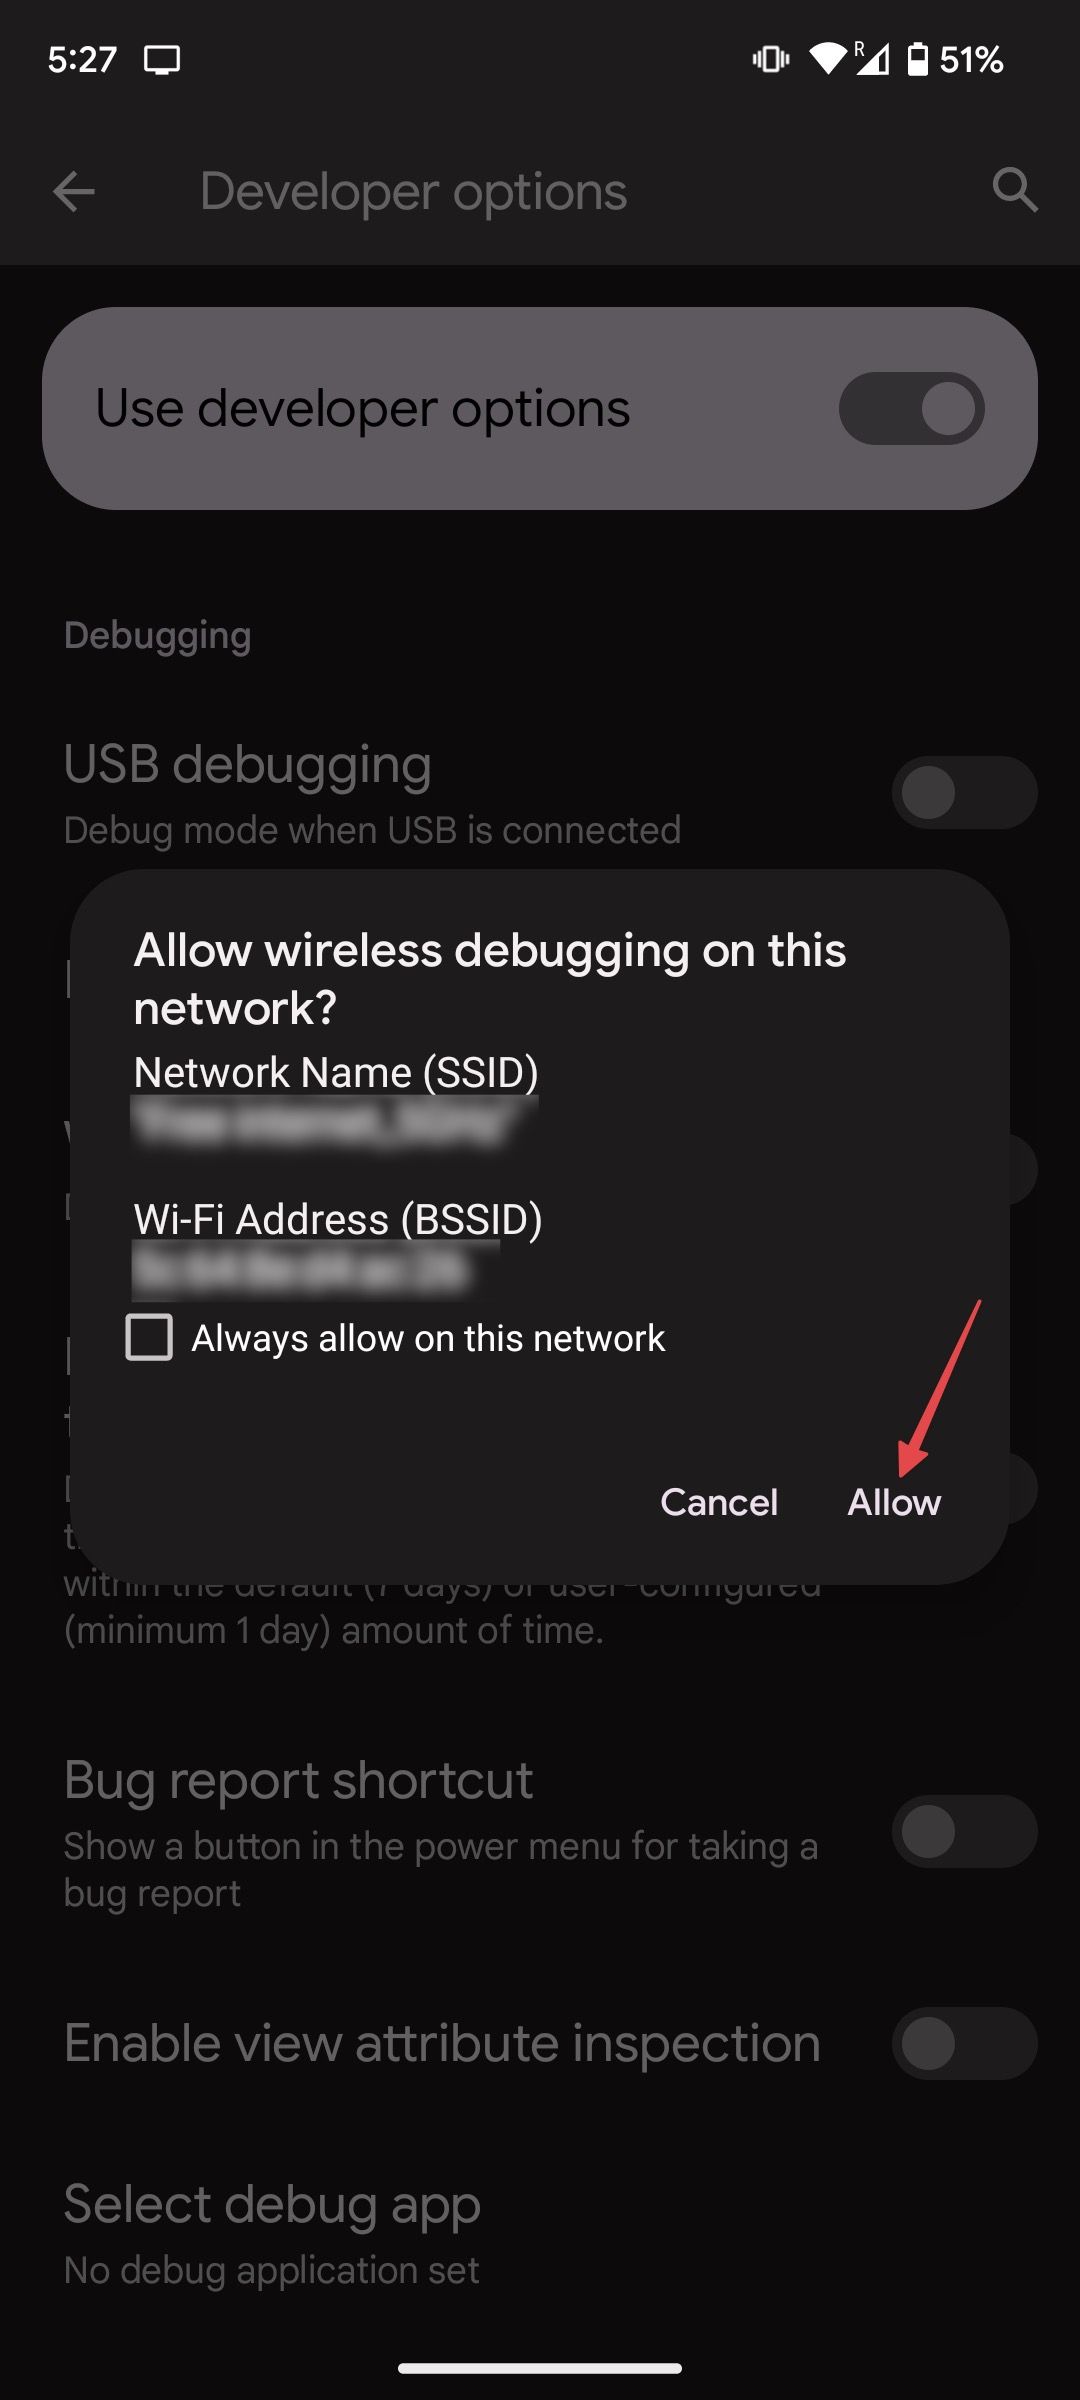
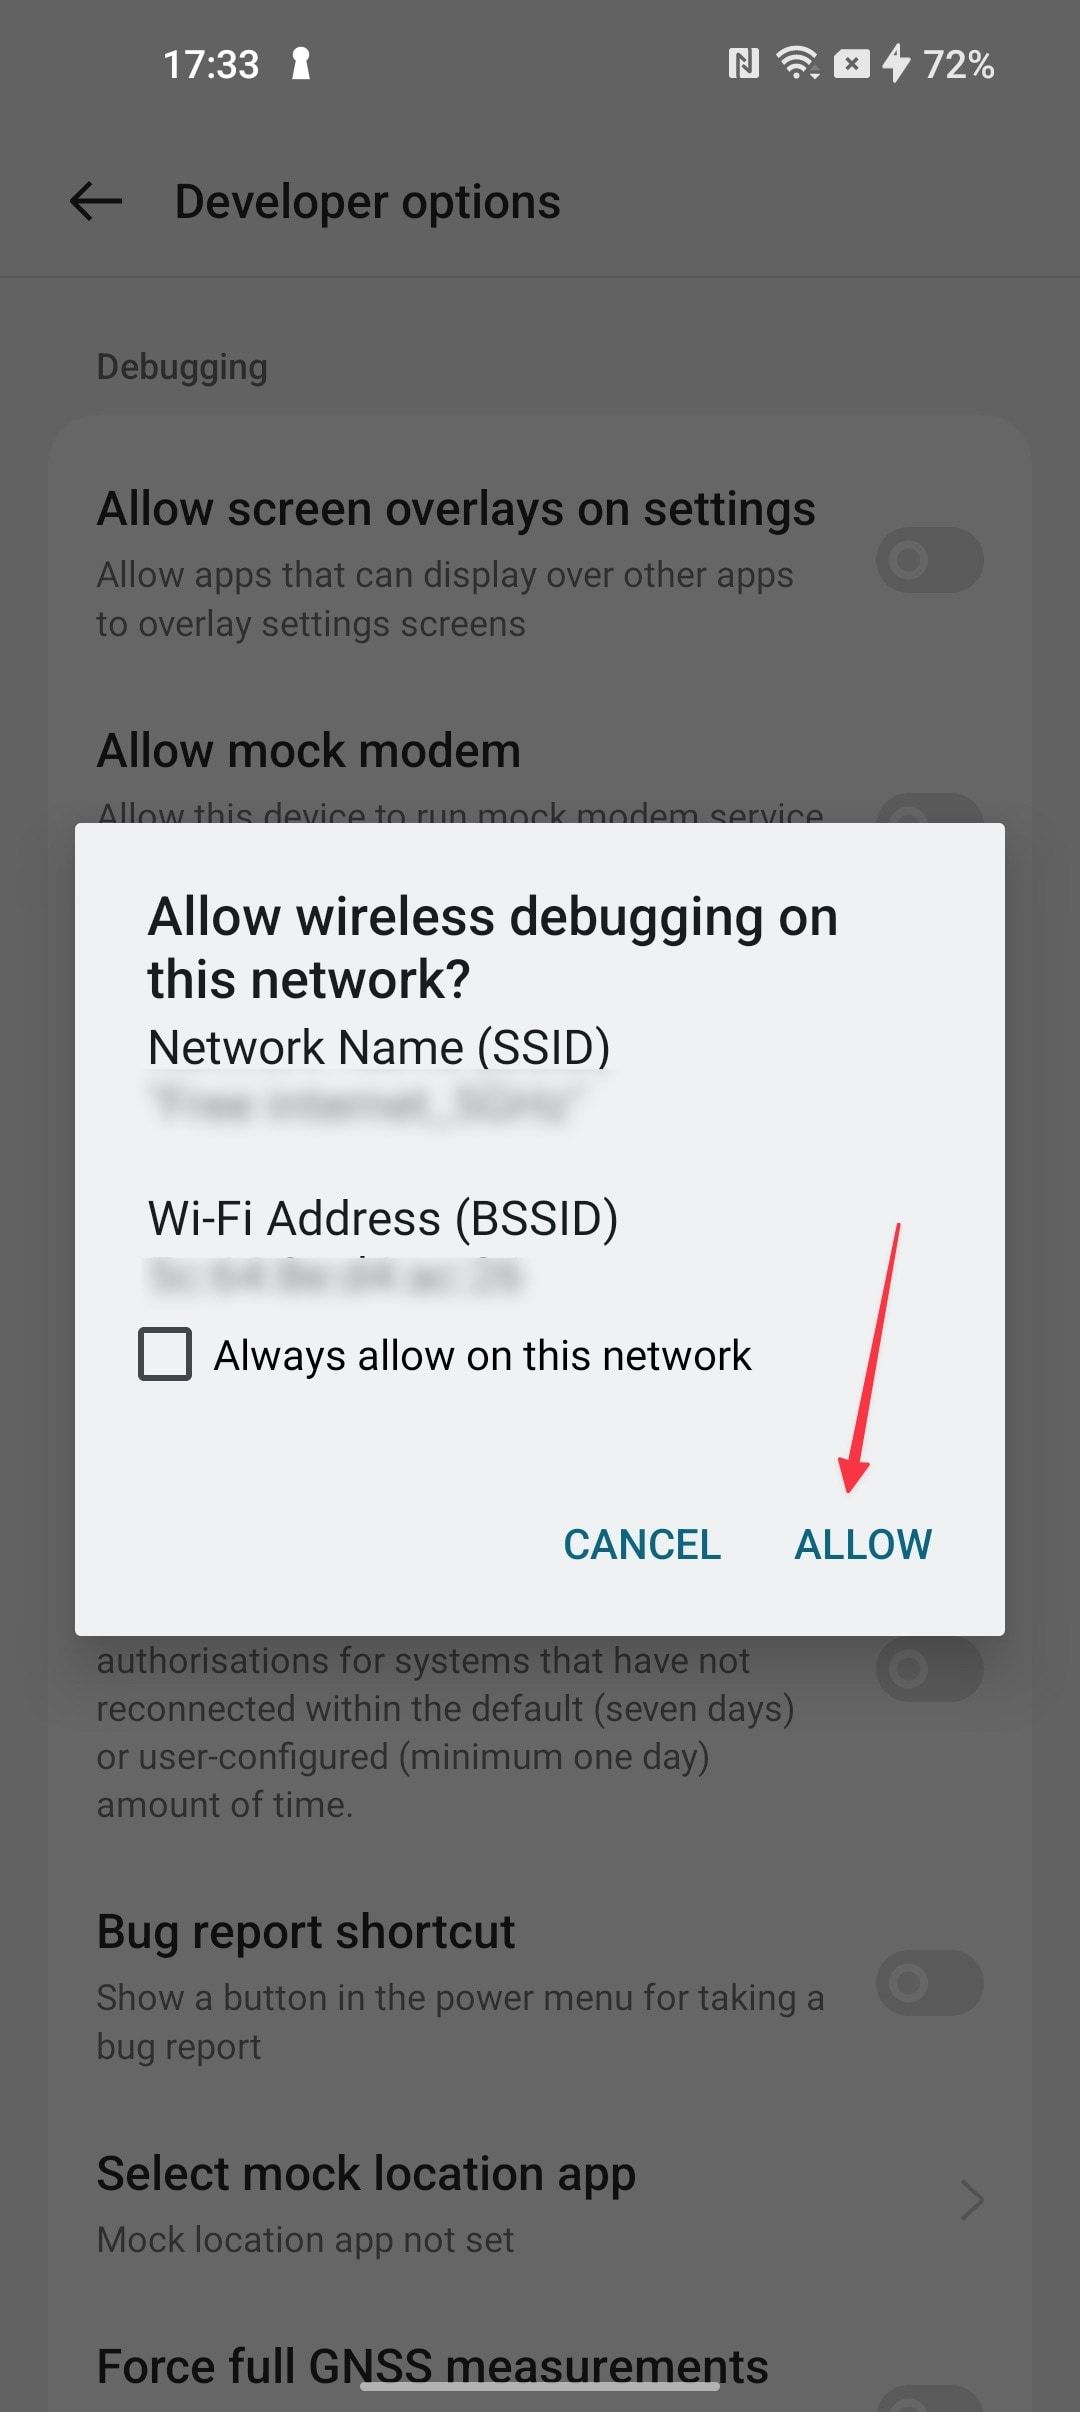
- turn on the adjacent switch Wireless troubleshooting. To choose give permission when you see a pop-up window.
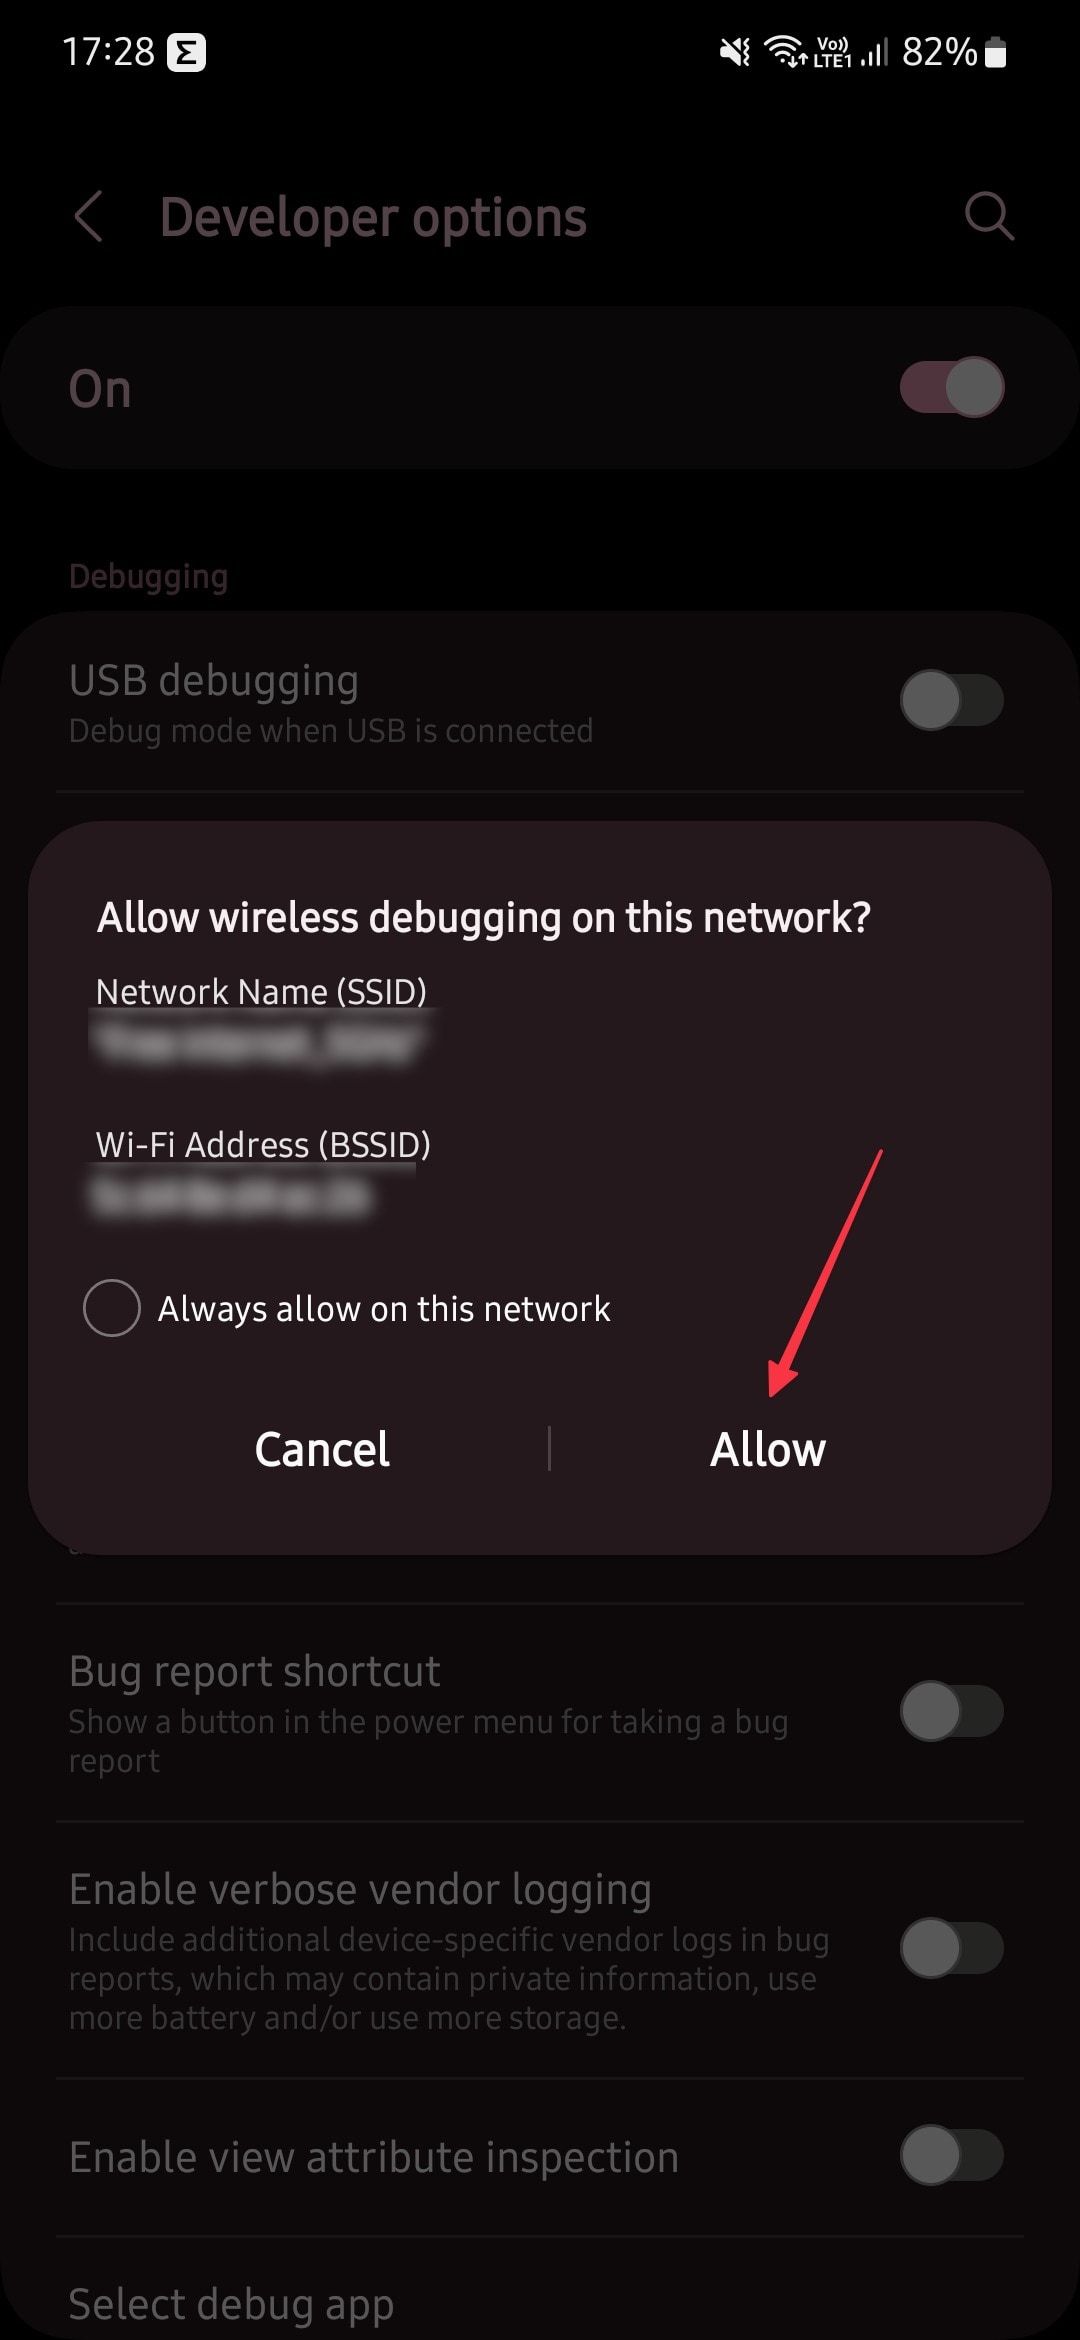
- Go for Samsung smartphones Settings > Developer options and tap the switch for Wireless Debugging.

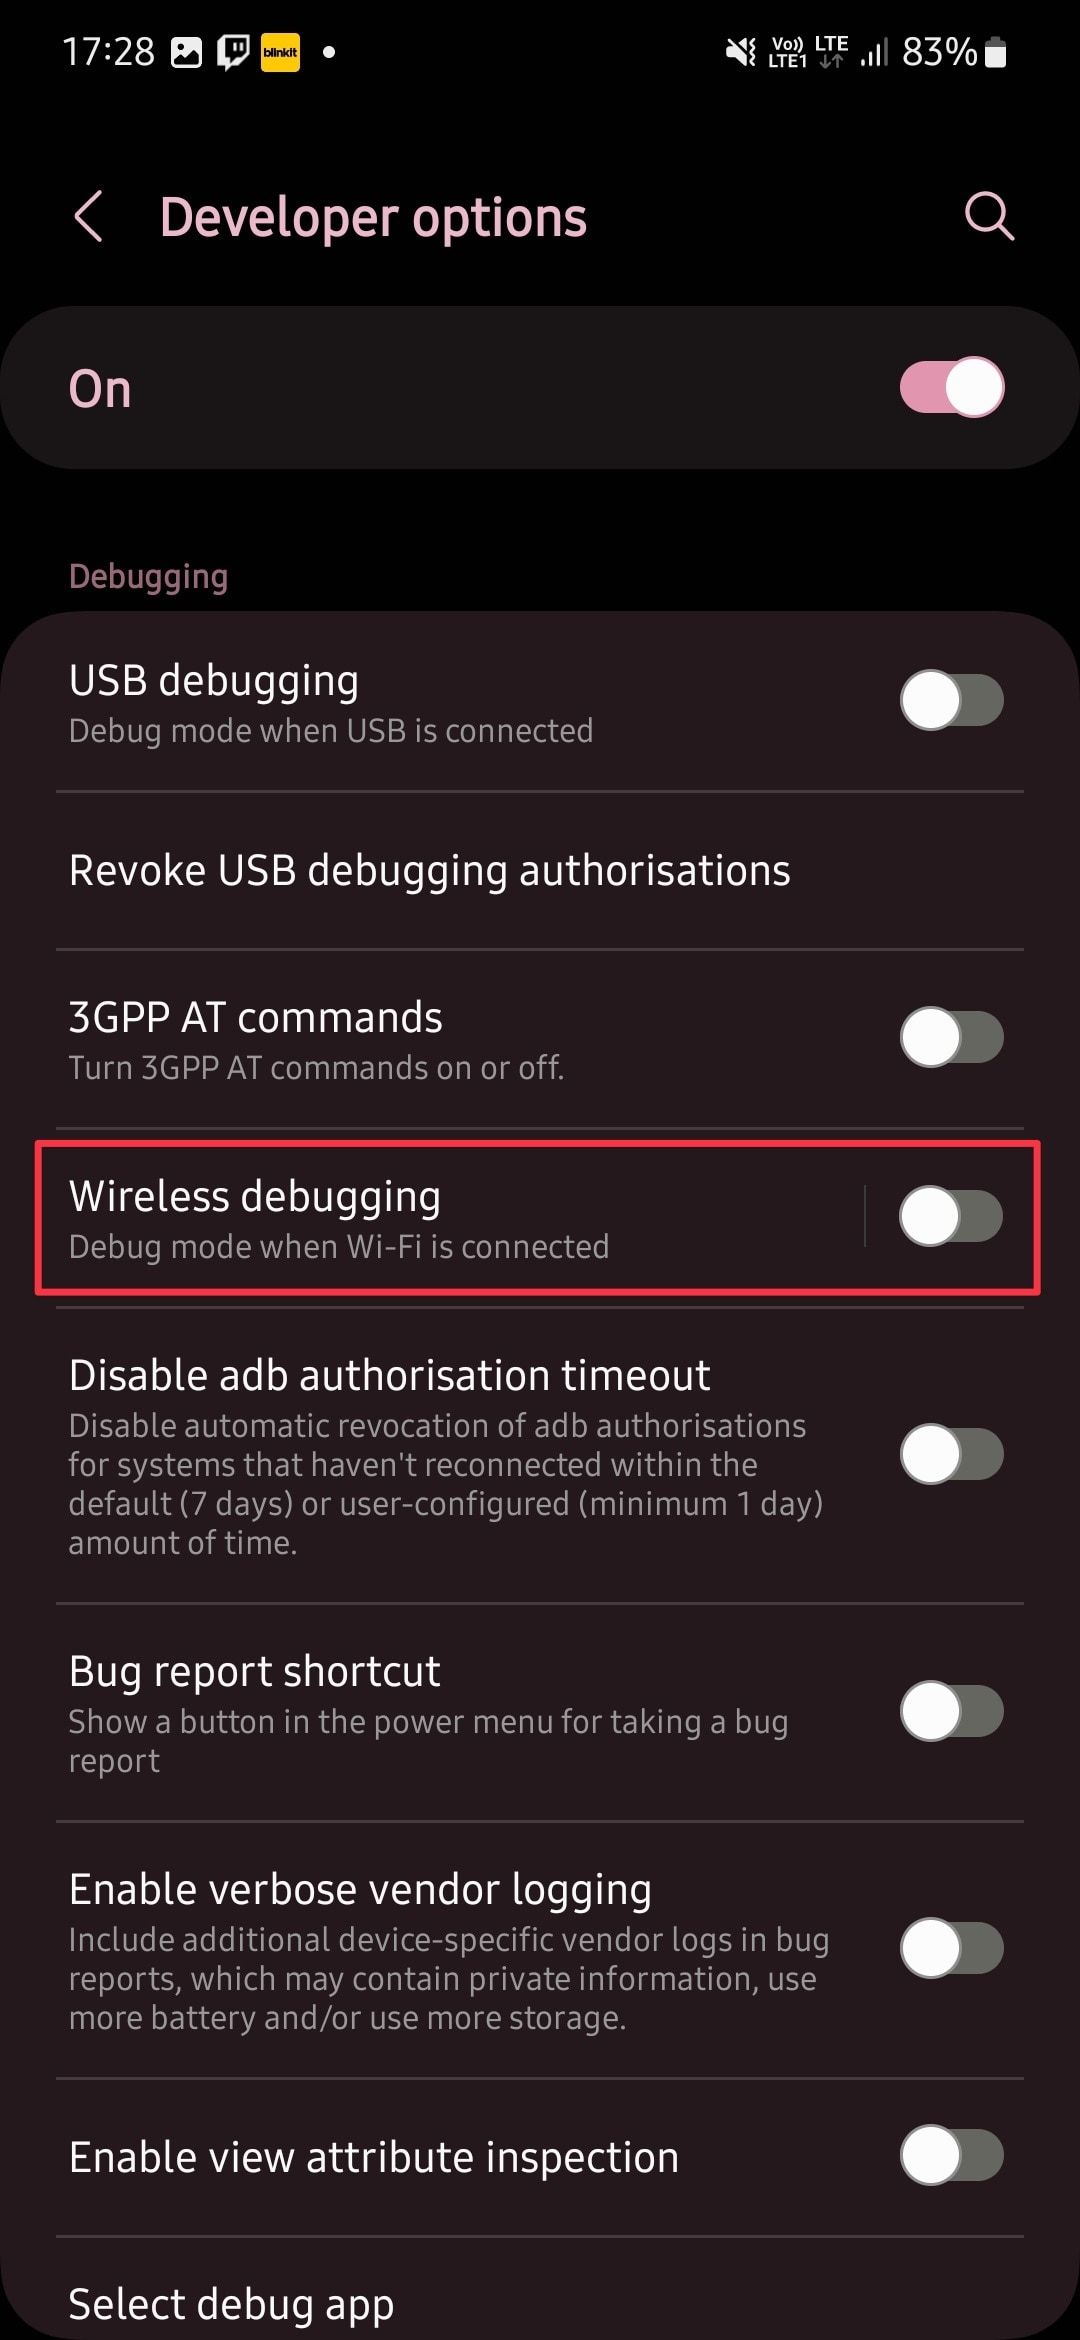
- tap give permission in the pop-up window to enable it.
- If you have a OnePlus smartphone then go for it Settings > Additional settings and tap Developer options.
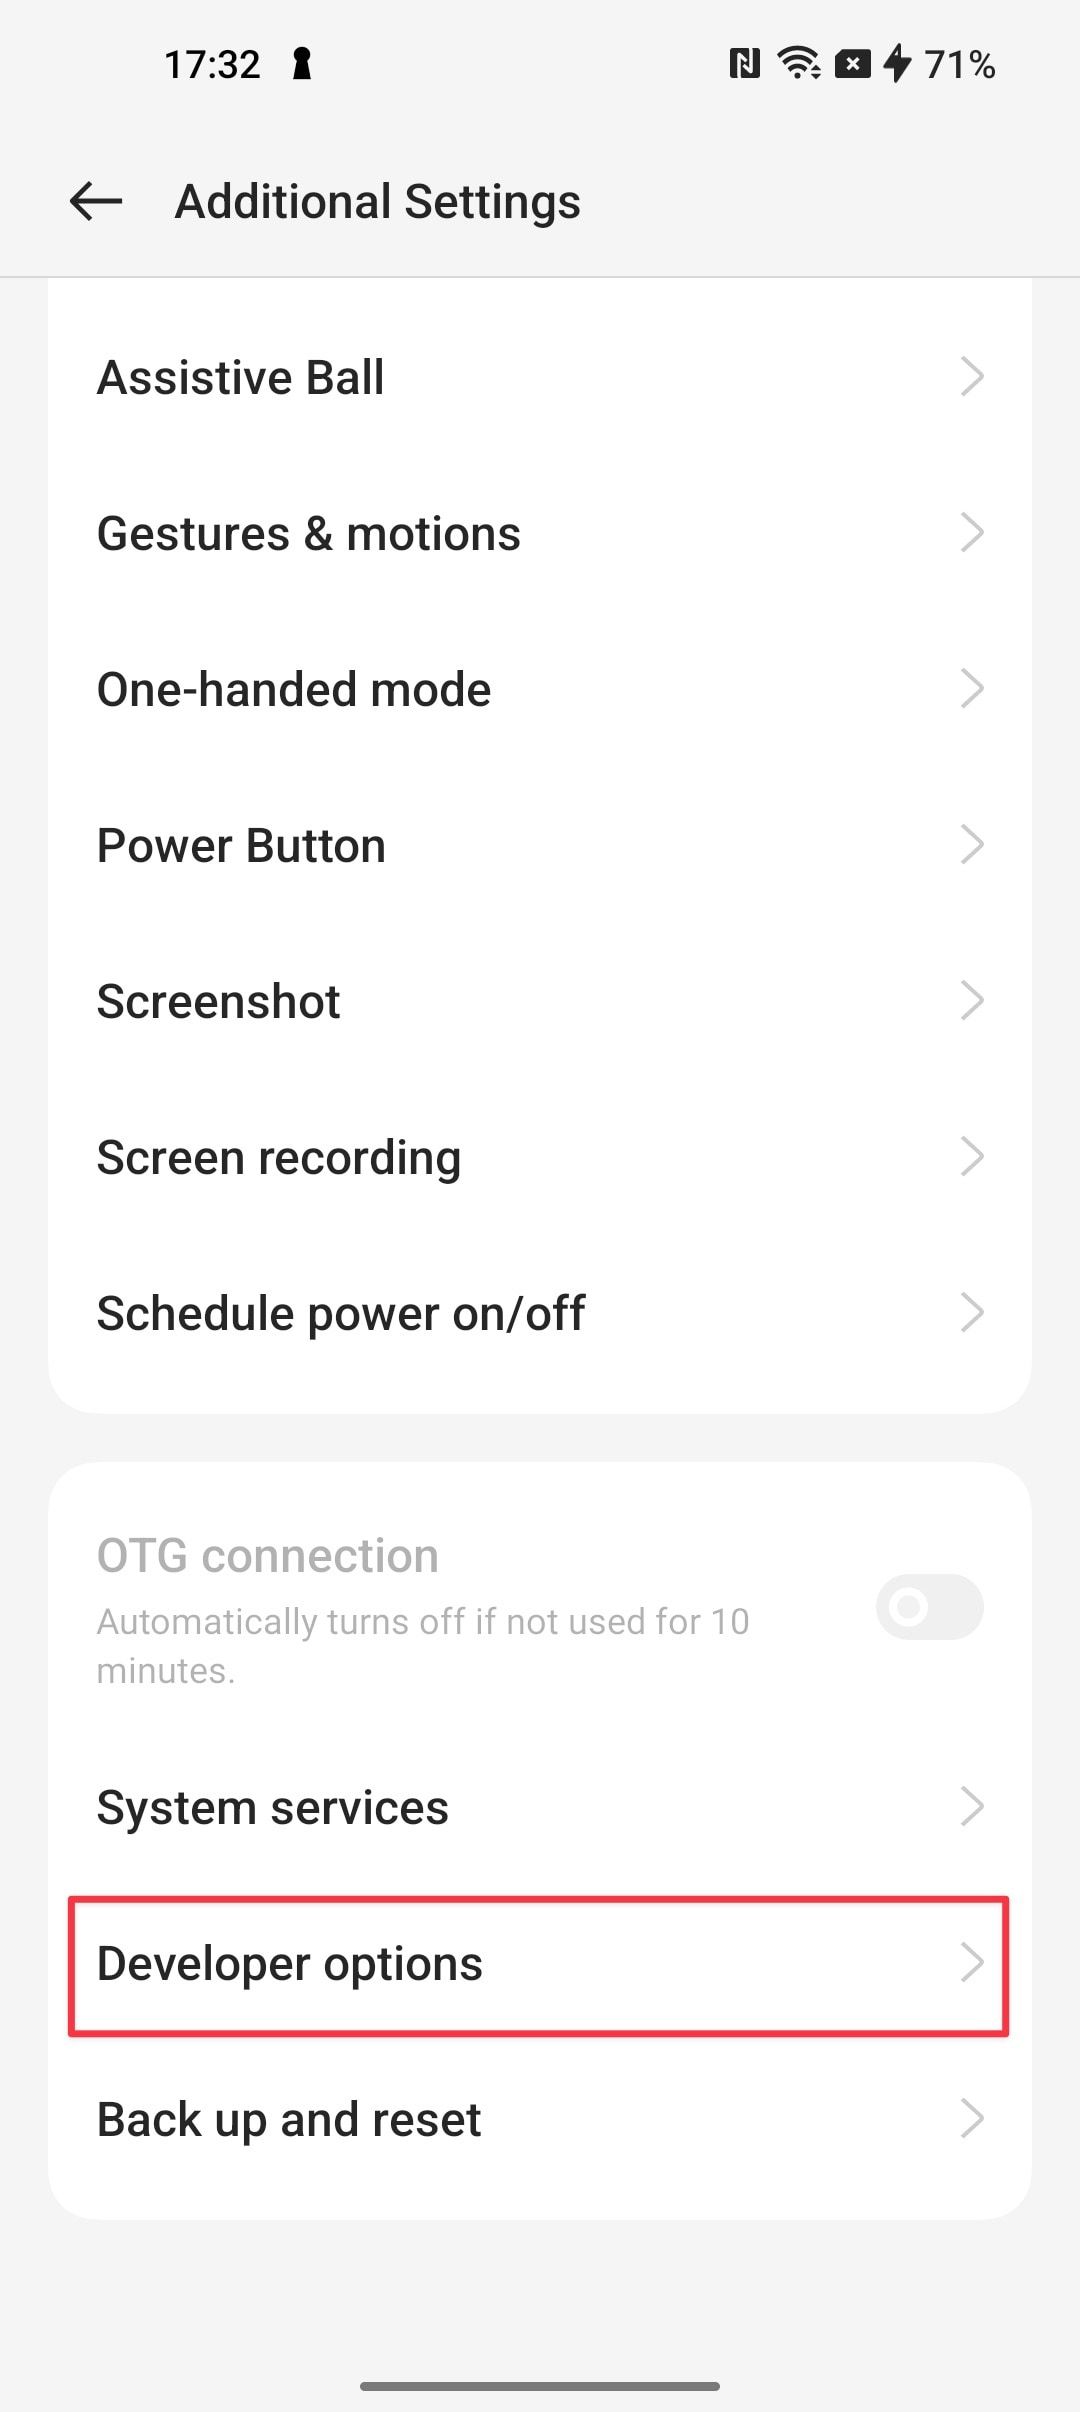
- Tap the switch next to it Wireless troubleshooting and select give permission to enable it.


Use Wireless ADB on your Android device
After enabling Developer Options and Wireless Debugging, you can use ADB wireless on your Android device. You don’t need to install ADB on your computer because you can use the Android SDK folder to run the commands. We’ll use a Mac to demonstrate this, but the steps are the same on Windows and Linux devices.
The only difference is that you don’t add “./” Before running ADB commands on Windows Command Prompt. For example, on a Mac, you run ./adb devices command to find the list of devices, but Windows, you run adb devices command.
- Open Wireless Debugging install and click Pair the device with the pairing code parameter.
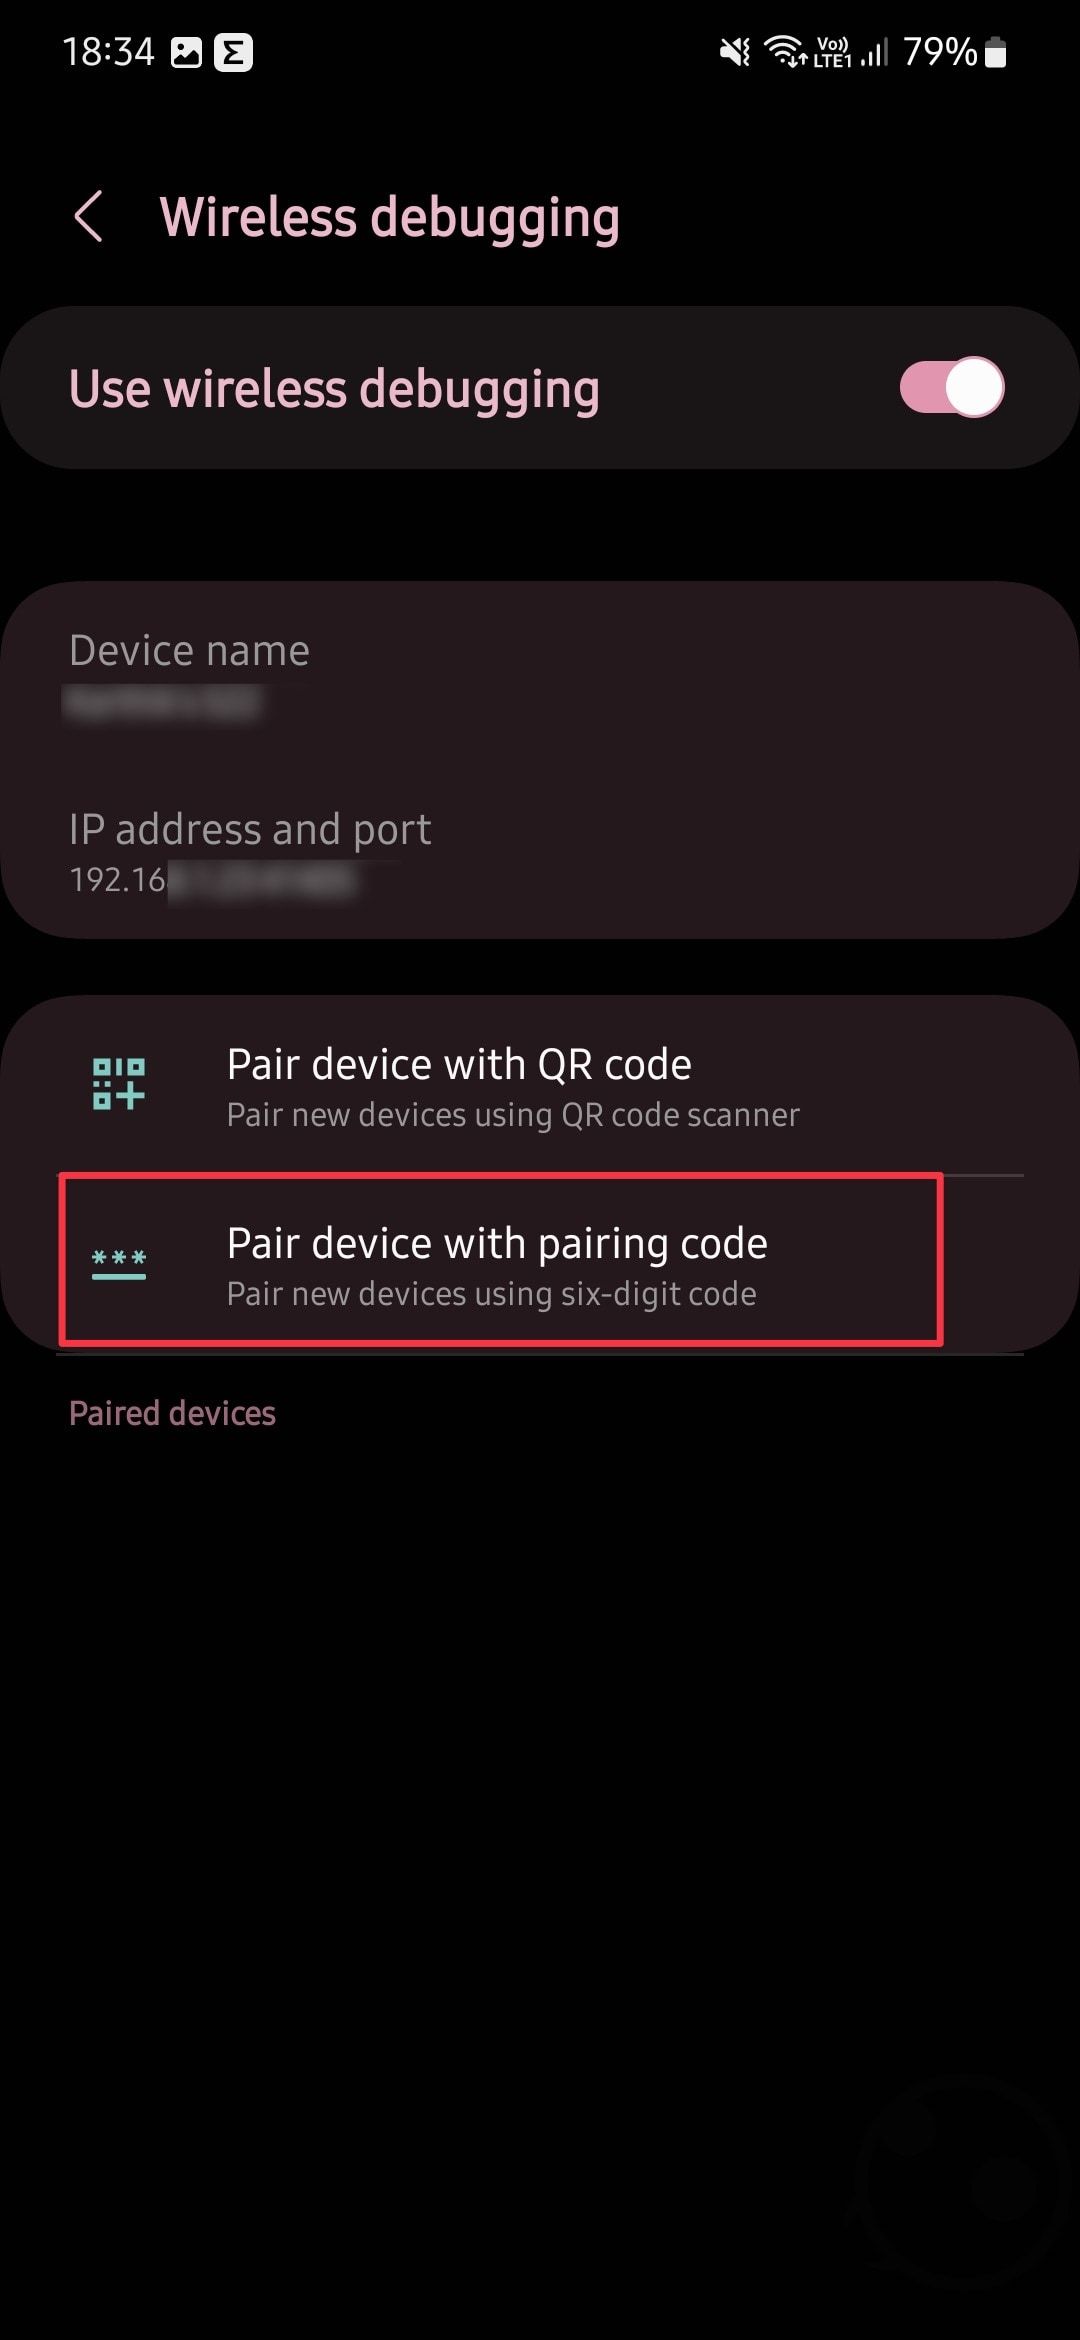
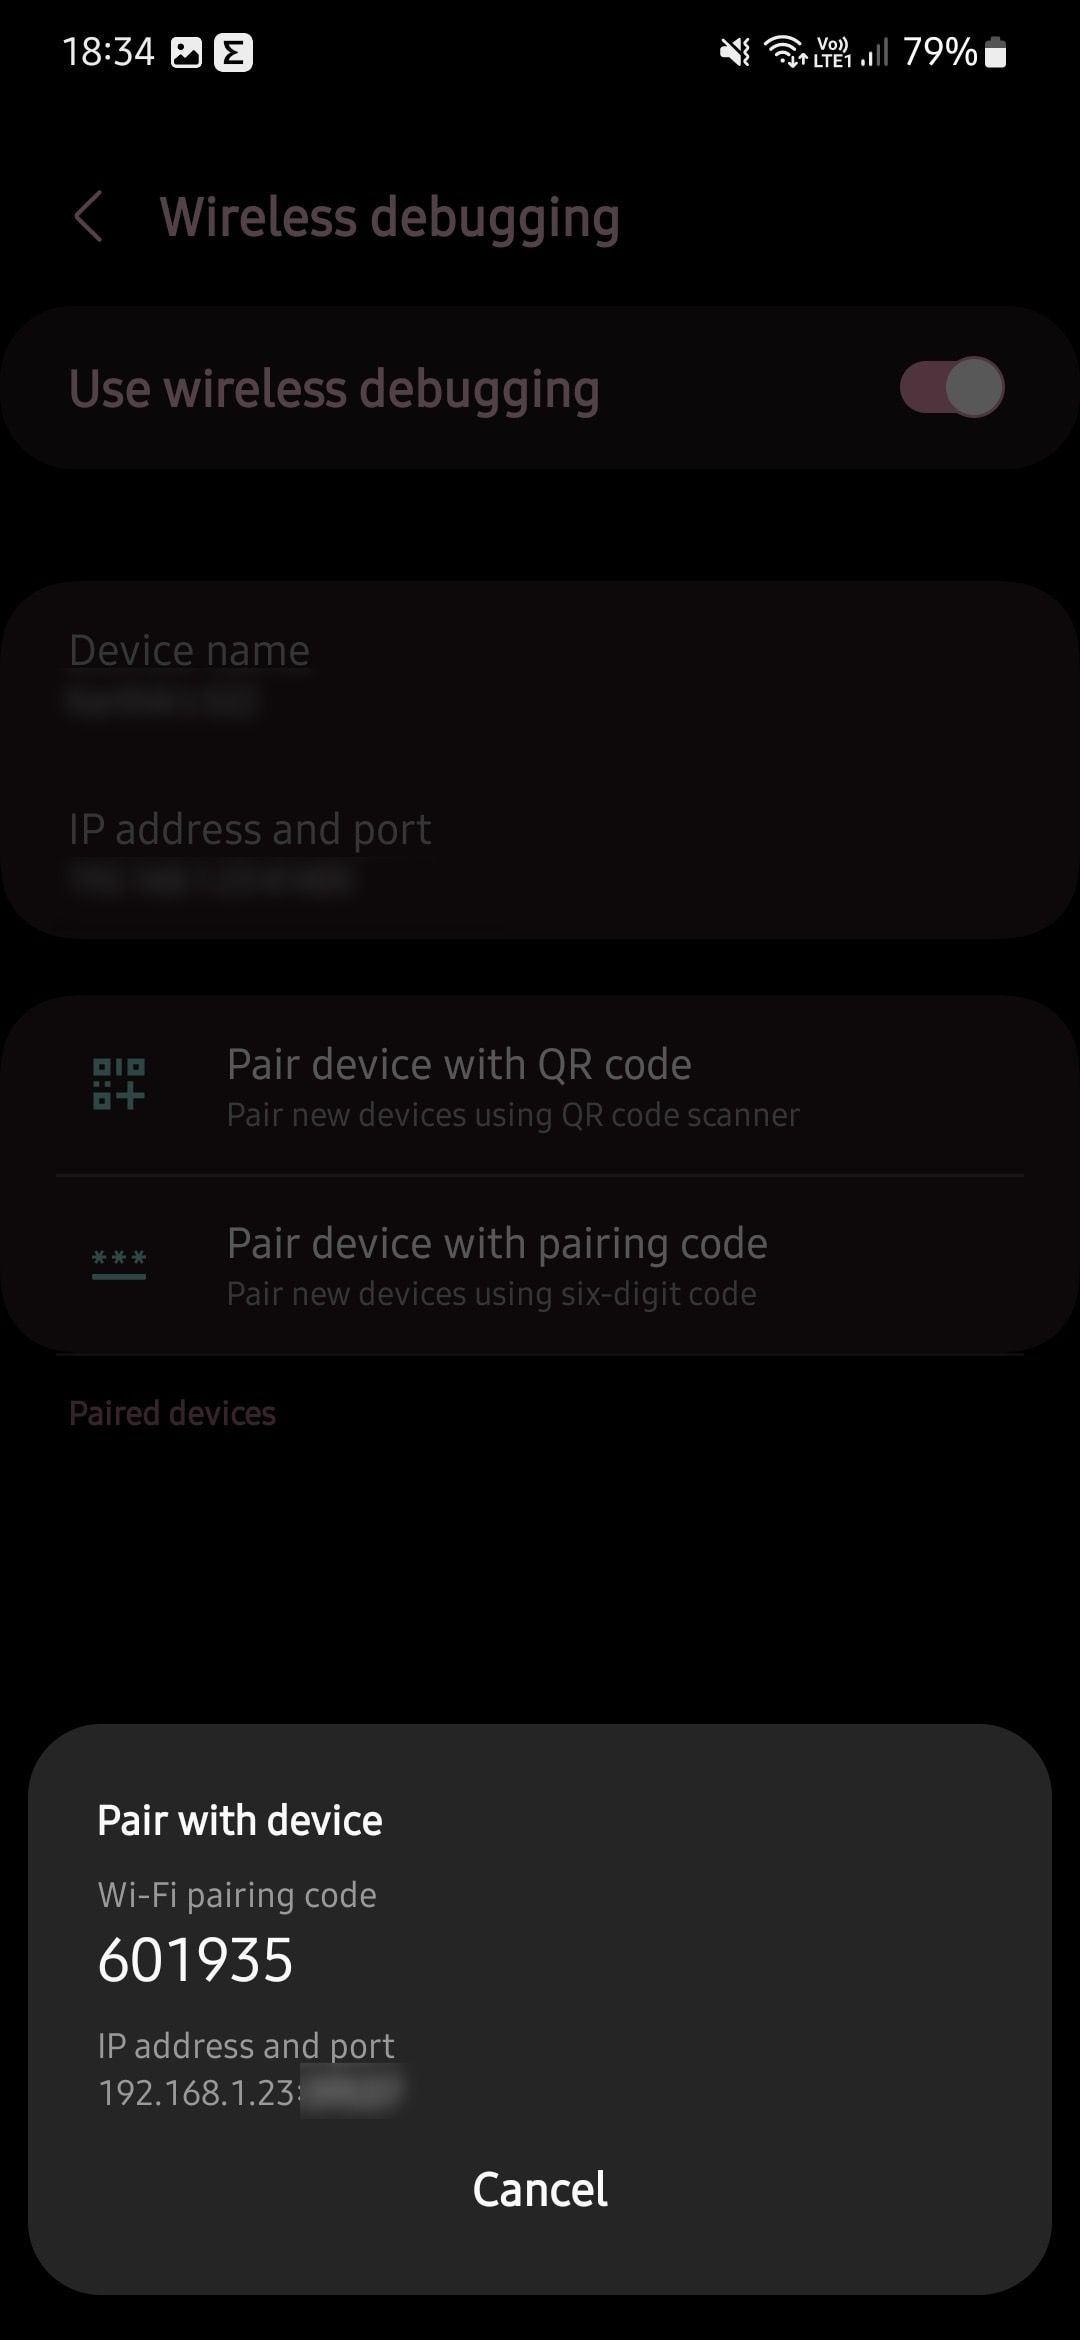
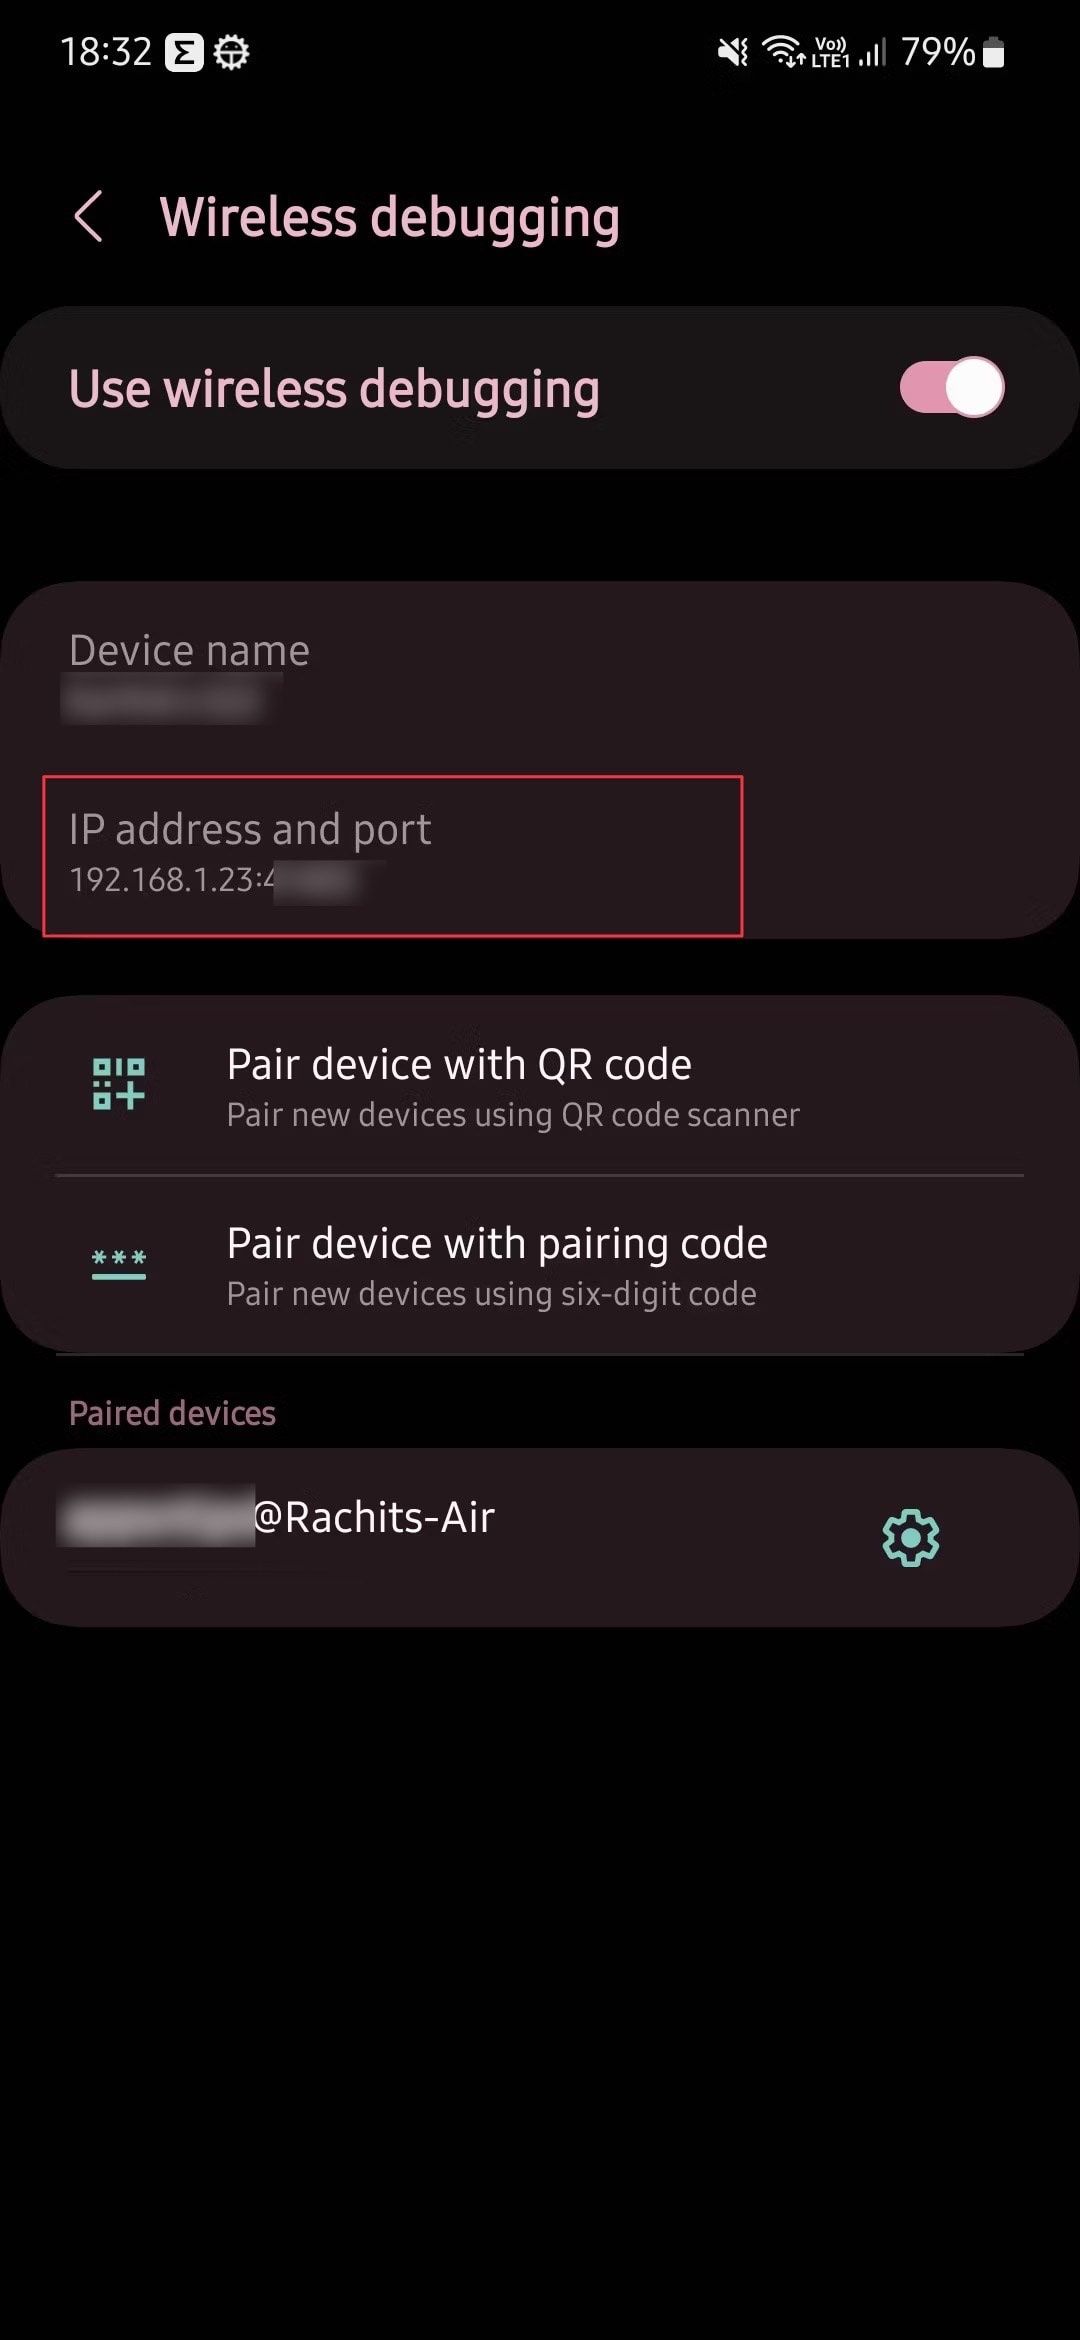
- You will see the IP address, port number and Wi-Fi pairing code.
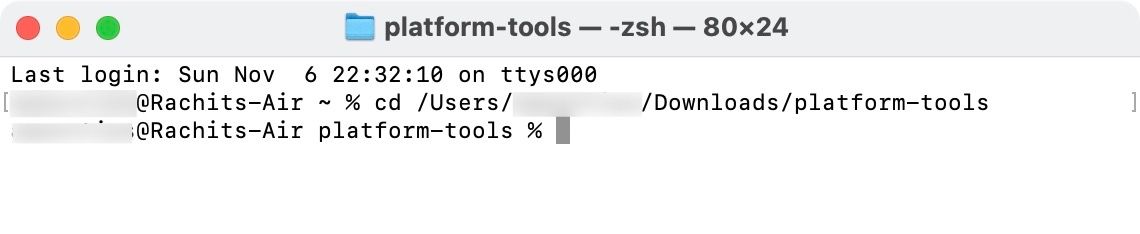
- If you’re using ADB on a Mac, open Terminal application, type CD then drag space and Android SDK platform tools folder to add its path.
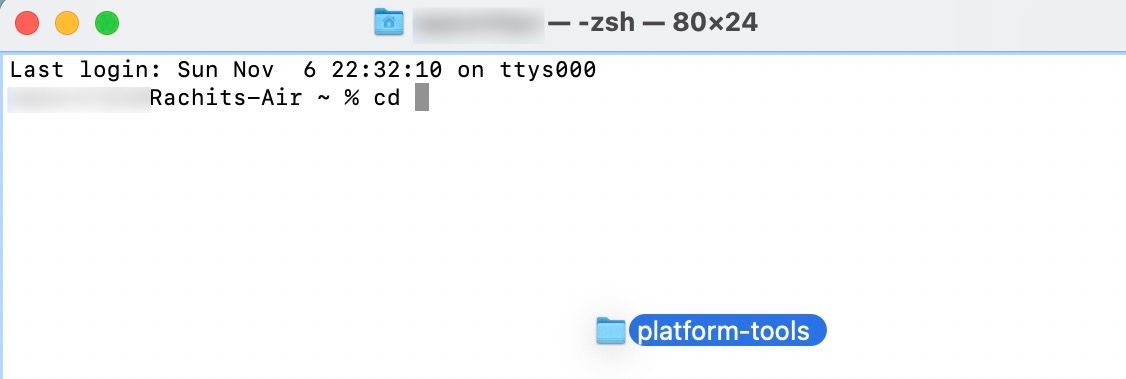
- Press Enter Open the way in the terminal.
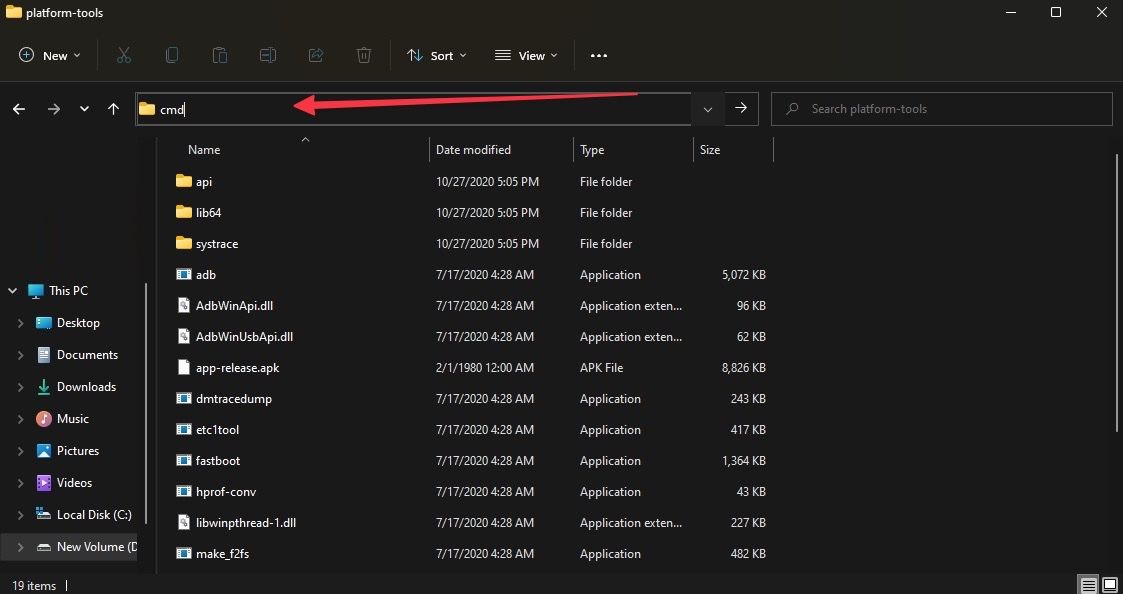
- Open the Android SDK in Windows platform tools a folder. Click the address bar and type cmdand press Enter to open the folder in the command line tool.
- type ./adb pair command in a terminal window. Add a space and type the IP address and port you saw in step 2. Don’t forget to remove ./ If you are using Windows, from the command line.
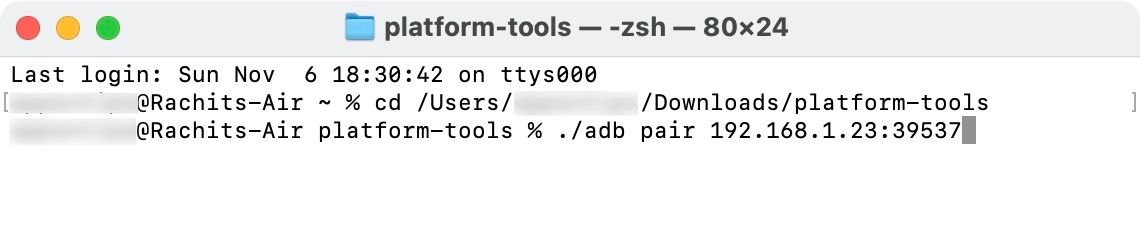
- Enter the pairing code and click Enter To pair your Android device with your computer.

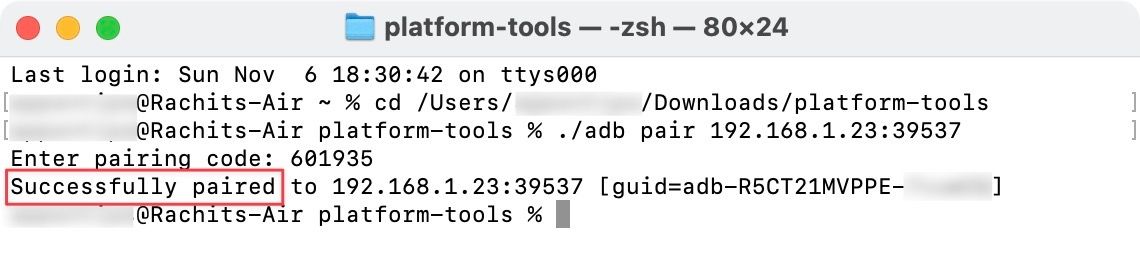
- You will see a successful pairing dialog on your computer and phone as shown in the screenshots below.
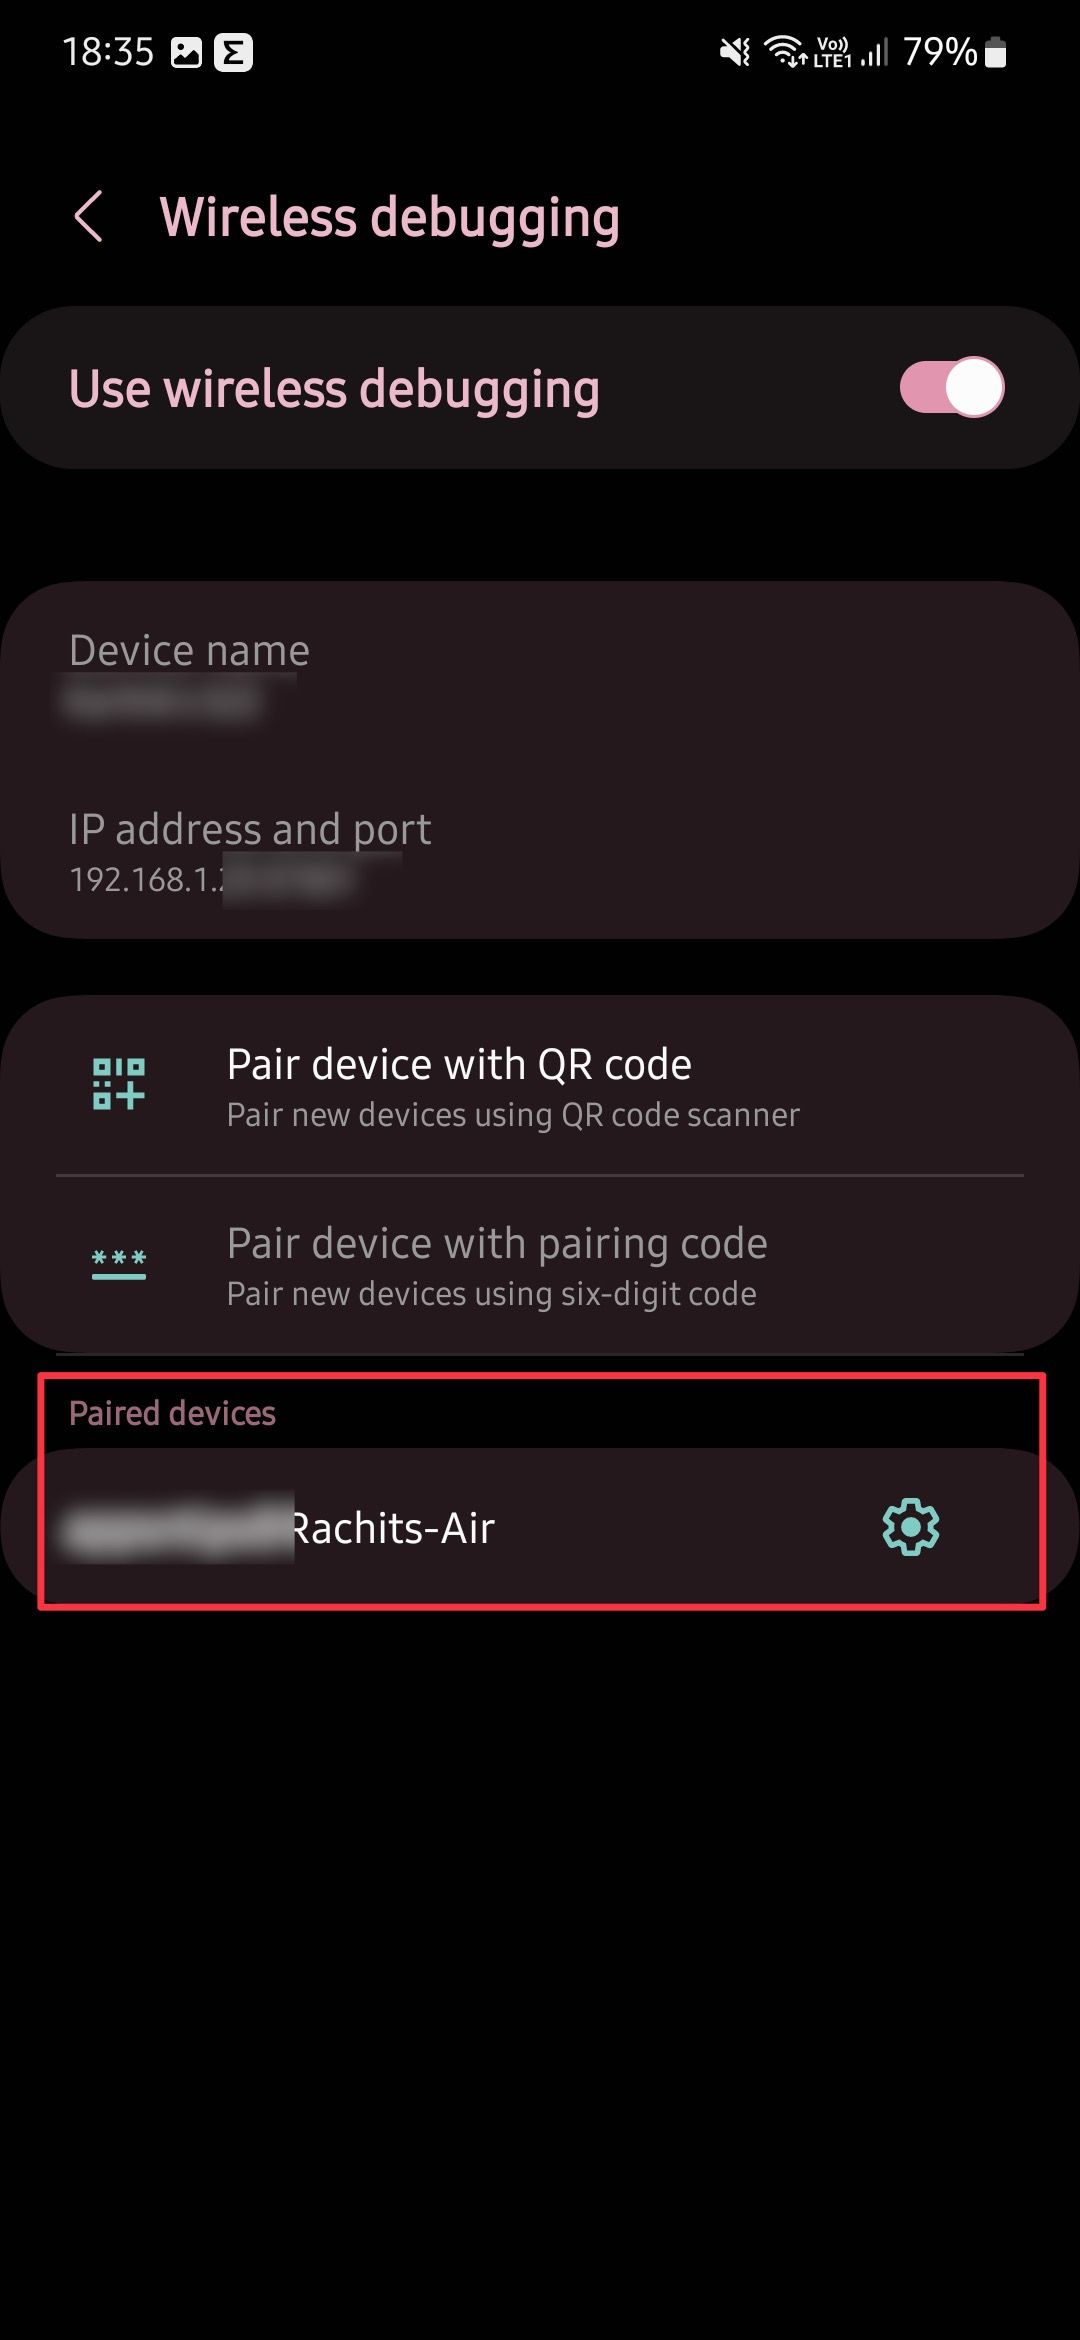
- Go back to main on your Android phone Wireless Debugging a face. On this page you will see the IP address of your Android device. You use this to connect your Android device.
- Use the command in a terminal window ./adb connection, followed by IP address and port. Press Enter execute the order.
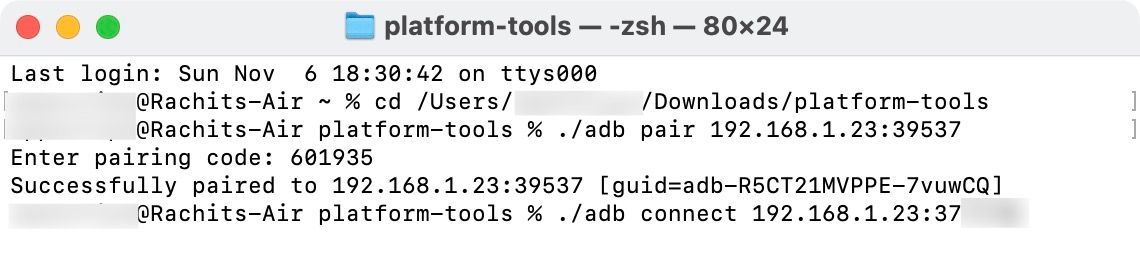
- You will see a successful connection notification on your Android device and computer.
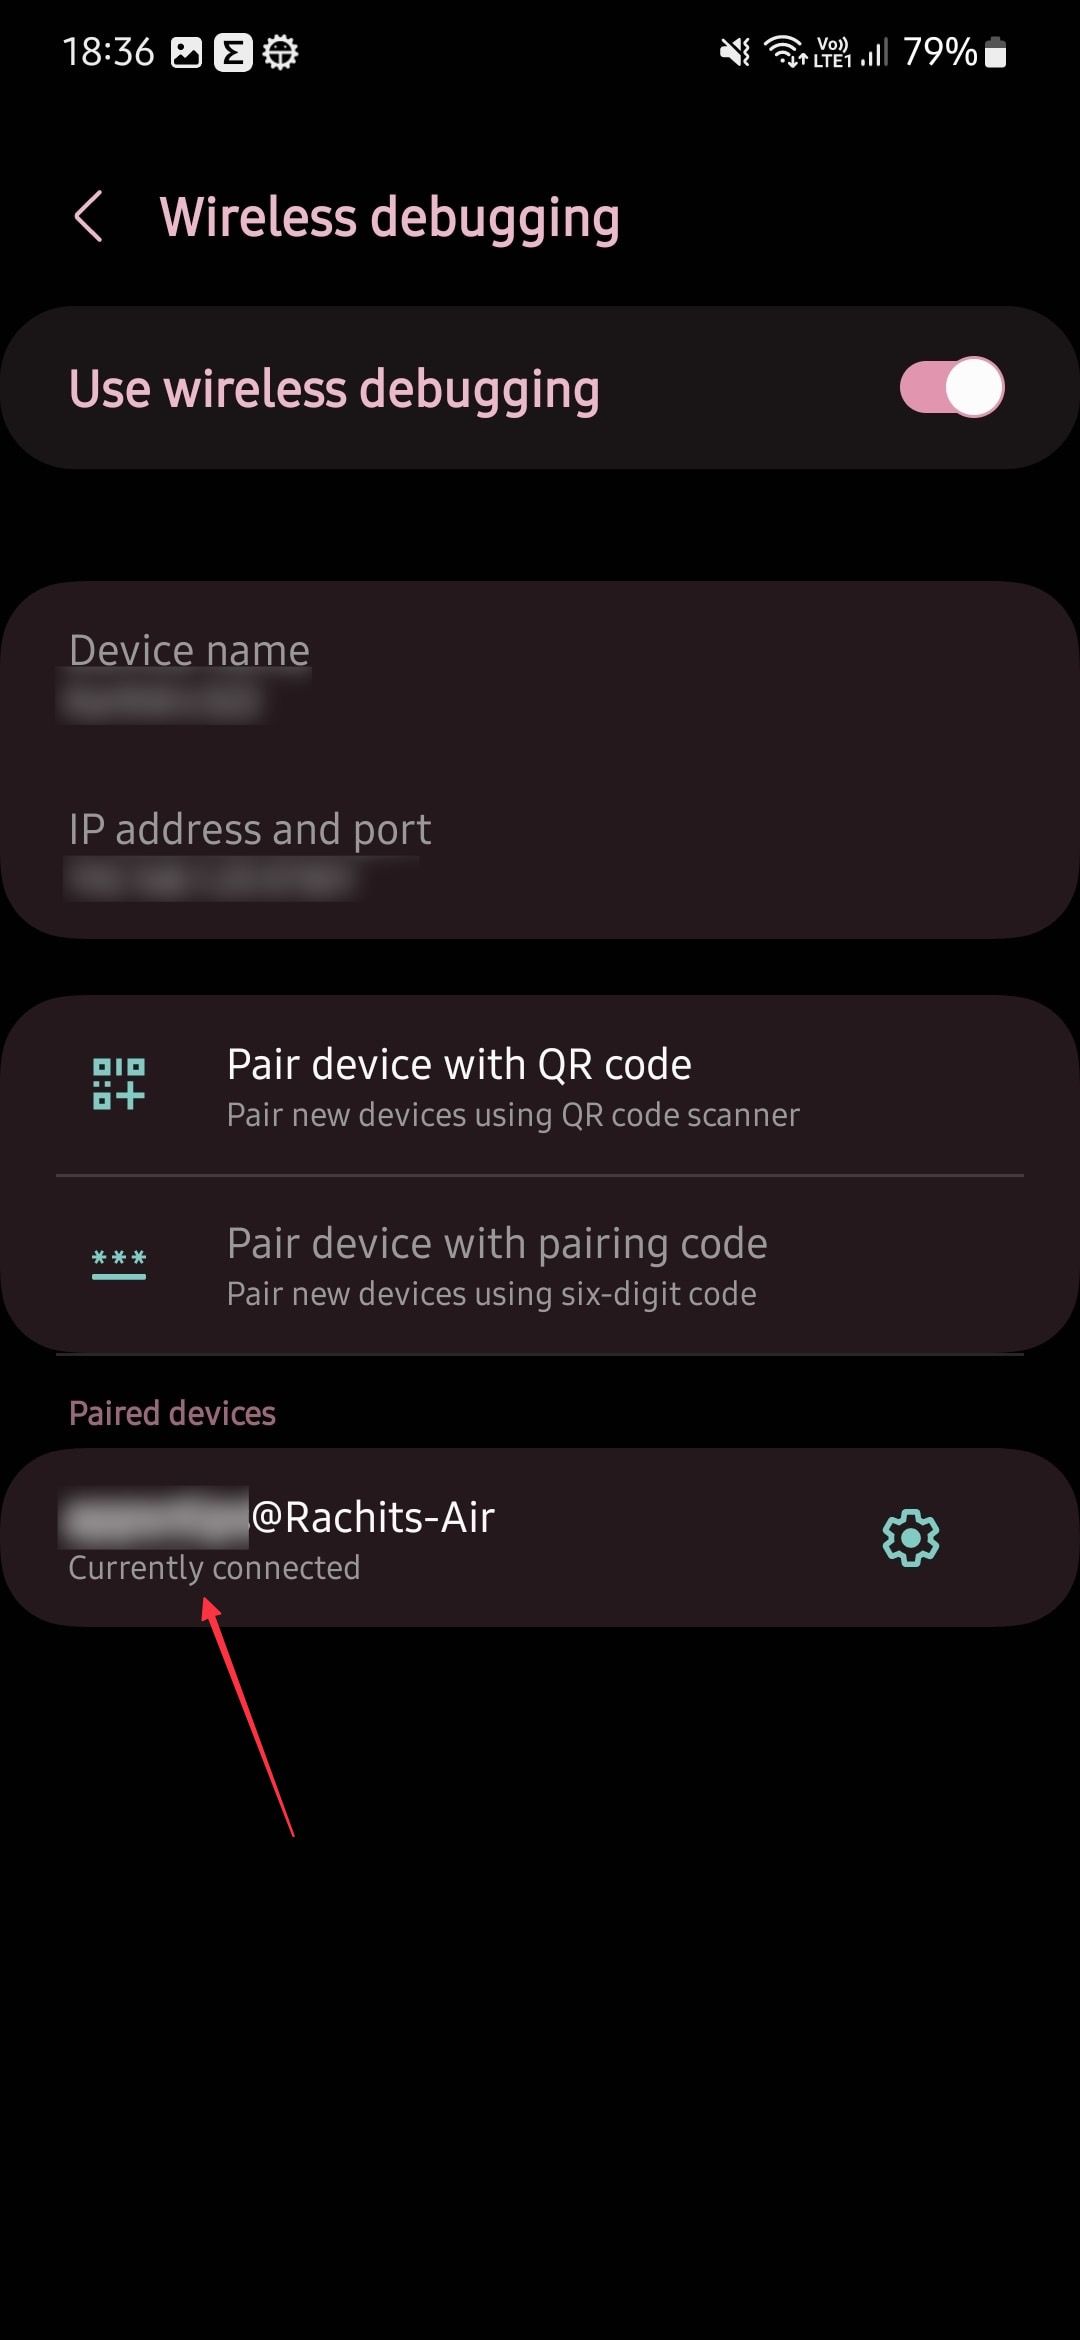


You have now installed wireless ADB on your Android device and can execute any ADB command. Run to make sure everything is working properly ./adb devices command to check your connected device.
Repair your Android phone wirelessly
You can use wireless debugging to do everything you can do with USB debugging. Whether you want to install an APK, debug your app or remove bloatware, wireless debugging can handle it. Since you don’t need to connect your phone via a wire, there’s no chance of disconnection when you move your devices.
[ad_2]
Source link